Falling Sand 1
Part 1 of the Falling Sand Project. In this project, you will learn the fundamentals of programming by building a fun and interactive simulation of different particles.
About the project
Welcome to the Falling Sand tutorial! In this project, you will learn the fundamentals of programming by building a fun and interactive simulation of different particles.
What you will learn:
- Basic JavaScript concepts like variables, the Document Object Model (DOM), and event listeners.
- How to use the HTML Canvas element to draw graphics on a webpage.
- Fundamental game logic and physics simulation.
- Object-oriented programming concepts like classes and inheritance.
- Problem-solving and debugging skills.
What you will make:
By the end of this tutorial, you will have a working simulation where you can click on the screen to create different types of particles that will fall and interact based on simple rules.
Further possibilities:
Once you’ve completed this tutorial, you can expand on it in many ways! You could add more particle types with unique behaviors (like fire that burns wood, or ice that melts), implement more complex physics like animals and plants. The possibilities are endless!
Setup
First, you’ll need to get the project code and set up your development environment.
Set up your IDE
We will be using VS Code in this tutorial but you can use any IDE, you can download VS Code from visualstudio.com.
Install the Live Server extension in Visual Studio Code: open the Extensions marketplace (usually by clicking on the four squares icon on the left sidebar) and search for “Live Server” by Ritwick Dey. Click “Install”.
Download the starter code
For version control, we will use GitHub. If you’re not familiar, GitHub is a platform for version control and collaboration, allowing developers to manage, share, and track changes to code efficiently, making teamwork and project management easier. Like Google Drive for programmers.
Here is a more in-depth breakdown oh what GitHub is and how it works Introduction to GitHub.
If you don’t have it already, download GitHub desktop: desktop.github.com/download.
To Fork the code:
- Go to github.com/aidankeighron/Falling-Sand-Tutorial
- Click the “Fork” button in the top right corner. (This will create a copy of the project in your own GitHub account)
- Then open your newly created fork and click the green “Code” dropdown
- Select “Open with GitHub Desktop”
A
forkis a personal copy of a codebase where you can make changes without affecting others.
Running the project
Now let’s get the project running in your browser.
- Open the forked project in VS Code: Go to “File” -> “Open Folder” and select the directory where you cloned your forked repository.
- Start Live Server: Open the
index.htmlfile in VS Code. Right-click anywhere in the file and select “Open with Live Server”. - Open in a new tab (if it didn’t automatically): Live Server will usually open the webpage in your default browser. If it doesn’t, you should see a message in the VS Code status bar at the bottom indicating the port number (e.g., “Port: 5500”). Open a new tab in your browser and navigate to http://127.0.0.1:5500/ (or the port number shown in VS Code).
- You should now see a webpage with the title “Falling Sand” and a blank rectangle (the canvas) in the center.
Basic JavaScript knowledge
This section will cover some fundamental JavaScript concepts that we’ll be using in this tutorial. If you are already comfortable with JavaScript, feel free to skip to the next section. w3schools is a great resource for learning or refreshing your knowledge of any of these concepts.
HTML DOM (accessing HTML DOM using getElementById)
The HTML Document Object Model (DOM) represents the structure of your HTML document as a tree of objects. JavaScript can interact with this tree to dynamically change the content and behavior of your webpage.
Accessing HTML elements in JavaScript:
getElementById is a JavaScript method that allows you to access a specific HTML element by its id attribute. In our index.html file, you’ll find elements with IDs like canvas, speedRange, and clear-button. We can access these elements in our JavaScript code like this:
Example (you don’t need to add this code)
1
2
3
4
5
const canvasElement = document.getElementById('canvas');
const speedSliderElement = document.getElementById('speedRange');
const clearButtonElement = document.getElementById('clear-button');

console.log(canvasElement); // This will log the canvas HTML element to the console.
Further reading: w3schools HTML DOM
Event listeners
Event listeners allow you to respond to specific events that happen on your webpage, such as a user clicking a button or moving their mouse. We attach event listeners to HTML elements using JavaScript.
Here’s an example of how we can add an event listener to our “Clear Screen” button:
Example (you don’t need to add this code)
1
2
3
4
5
6
7
const clearButtonElement = document.getElementById('clear-button');

// The arrow syntax is called a lambda expression
clearButtonElement.addEventListener('click', () => {
    // When the user clicks on the clearButtonElement, this code will run
    console.log('Clear button clicked!');
});
More info on lambda expressions or (arrow functions).
In this code:
- We get the button element using its ID.
- We use the
addEventListenermethod to attach a function to the'click'event. - The function inside
addEventListenerwill be executed every time the button is clicked.
Further reading: w3schools Event Listener
Draw particles on click
Now let’s start drawing particles on the canvas when you click the mouse.
Brief overview of how canvas works
The HTML <canvas> element is used to draw graphics on a webpage using JavaScript. It’s like a blank painting surface that you can control with code. To draw on the canvas, you first need to get its 2D rendering context. This context provides methods for drawing shapes, text, images, and more.
In our canvas.js file, you’ll see this code at the top:
Example (you don’t need to add this code)
1
2
const canvas = document.getElementById('canvas');
const ctx = canvas.getContext("2d");
This code gets the canvas element from our HTML and then gets its 2D rendering context, which we store in the ctx variable. We’ll use this ctx variable to draw our particles.
Mouse Listeners
In the canvas.js file, you’ll also find a function called setUpMouseListeners:
Example (you don’t need to add this code)
1
2
3
4
5
6
7
8
9
10
11
12
13
14
15
export function setUpMouseListeners() {
    // On start mouse click
    canvas.addEventListener("mousedown", (event) => {
        isDragging = true;
        mousePosition = {clientX: event.clientX, clientY: event.clientY};
    });
    // On move mouse
    canvas.addEventListener("mousemove", (event) => {
        mousePosition = event;
    });
    // On release mouse click
    canvas.addEventListener("mouseup", (event) => {
        isDragging = false;
    });
}
This function sets up three event listeners on our canvas element:
- mousedown: This event is triggered when you press the mouse button down while the cursor is over the canvas. When this happens, we set the
isDraggingvariable to true and store the current mouse coordinates in themousePositionvariable. - mousemove: This event is triggered every time you move the mouse cursor while it’s over the canvas. We update the
mousePositionvariable with the latest coordinates. - mouseup: This event is triggered when you release the mouse button. We set the
isDraggingvariable back tofalse.
In our main.js file, inside the update function, you’ll see how we use these listeners to create particles when the mouse is clicked and dragged:
1
2
3
4
5
6
7
8
9
function update() {
    // Get mouse position
    const {isDragging, mousePosition} = getMouse();
    // If dragging (clicked) and a valid mouse position then create a new particle
    if (isDragging && mousePosition) {
        createParticle(mousePosition);
    }
    // ... rest of the update function
}
Draw particles on the canvas
Now, let’s write the code that actually draws the particles on the canvas. Open the canvas.js file and find the redraw function. You’ll see a TODO comment inside the inner for loop.
If you looked at how we are creating
gridyou will see that this code does have an error, we will fix it in the next section.
1
2
3
4
5
6
7
8
9
10
11
12
13
14
15
16
17
18
export function redraw() {
    // Clear previous frame
    ctx.clearRect(0, 0, canvas.width, canvas.height);

    // Loop through all elements in the grid
    for (let row = 0; row < grid.length; row++) {
        for (let col = 0; col < grid[0].length; col++) {
            // 👇 Put the following code here 👇
            const particle = grid[row][col];

            // Get particle color
            ctx.fillStyle = particle.color;
            // Draw particle (multiple by eachSize to scale it from grid coordinates to pixels)
            ctx.fillRect(col * eachSize, row * eachSize, eachSize, eachSize);
            // 👆 Put the following code here 👆
        }
    }
}
This code iterates through each cell in our grid (which represents the canvas). For each cell, it gets the particle at that location. It then sets the fillStyle of the canvas context to the particle’s color and draws a filled rectangle using ctx.fillRect. The col * eachSize and row * eachSize calculations convert the grid coordinates to pixel coordinates on the canvas. Once you have added the above code go ahead and run it and try to create some particles by clicking or dragging on the canvas. There is an error in the code and if you have your console open you will see errors there, will will fix them in the next section.
Debugging errors
The code we just added has an error.
gridusesnullto represent empty spaces. This will cause an error when we try to accessparticle.colorbecauseparticleisnull. Open your browser’s developer tools (usually by pressingF12or right-clicking and selecting “Inspect”). Go to the “Console” tab. You should see many error messages.
The error message you are seeing likely says something like Cannot read properties of null (reading 'color'). This means that at some point in our grid, there is a null value, and we are trying to access the color property of something that doesn’t exist (i.e., null).
In our grid, we are using null to represent empty spaces where there is no particle. When the redraw function encounters a null value, it tries to access particle.color, which causes the error because null doesn’t have a color property.
To fix this issue we need to add a null check to make sure we are not drawing any empty particles. This can be done by wrapping our drawing code in if (particle != null) or even easier if (particle), this works because null is considered false, while our object (Class) is considered true.
1
2
3
4
5
6
7
8
9
10
11
12
13
14
15
16
17
18
19
export function redraw() {
    // Clear previous frame
    ctx.clearRect(0, 0, canvas.width, canvas.height);

    // Loop through all elements in the grid
    for (let row = 0; row < grid.length; row++) {
        for (let col = 0; col < grid[0].length; col++) {
            const particle = grid[row][col];

            // Check if there is a particle at (row, col). (null == false)
            if (particle) {
                // Get particle color
                ctx.fillStyle = particle.color;
                // Draw particle (multiple by eachSize to scale it from grid coordinates to pixels)
                ctx.fillRect(col * eachSize, row * eachSize, eachSize, eachSize);
            }
        }
    }
}
There are surprisingly few things in JavaScript that are considered
false. Mainlyfalse,0,""(empty string),nullandundefined, andNaN. It is important to note that empty lists[]and objects{}are consideredtrue.
Try clicking on the canvas again. You should now see orange squares appearing where you click!
Sand particle
Now that we can draw sand particles, let’s make them fall!
Inheritance
In programming, classes are like blueprints for creating objects. An object is a collection of data (properties) and actions (methods). In our project, we’ll use classes to represent different types of particles, like Sand.
If you are confused about what classes are and how they work check out this breakdown
Inheritance is a powerful concept in object-oriented programming where a new class (called a subclass or derived class) can inherit properties and methods from an existing class (called a superclass or base class). This helps us write more organized and reusable code.
In our particles.js file, you’ll see a base Particle class:
1
2
3
4
5
6
7
8
9
10
11
12
13
14
15
16
17
18
19
20
21
22
23
24
25
26
27
28
29
30
31
32
/**
 * Base particle class
 */
class Particle {
    constructor() {
        this.color = "";
        this.type = "";
    }

    /**
     * Returns true if the particle should swap with other when trying
     * to move onto the same grid location as {@link other}.
     *
     * EX: Let sand sink below water
     *
     * @param {Particle} other
     * @returns {boolean} Should the particle swap
     */
    swap(other) {
        return false;
    }

    /**
     * Update the particle at location (row, col)
     *
     * @param {number} row
     * @param {number} col
     */
    update(row, col) {

    }
}
This is our base blueprint for all particles. It has a constructor that initializes the color and type properties, and it has two methods: swap and update.
Next, you’ll see the Sand class:
1
2
3
4
5
6
7
8
9
10
11
12
13
14
15
16
17
18
/**
 * Sand particle
 */
export class Sand extends Particle {
    constructor() {
        super(); // Calls the constructor of the parent class (Particle)
        this.color = "orange";
        this.type = "sand";
    }

    swap(other) {
        // TODO make sand fall under the water
    }

    update(row, col) {
        // TODO update sand
    }
}
Notice the extends Particle keyword. This tells JavaScript that the Sand class inherits from the Particle class. This means that the Sand class automatically gets the color, type, swap, and update properties and methods from the Particle class.
The update(row, col) method is where we’ll define how a sand particle behaves over time. We need to modify this to move the sand down one row in the grid every time the update is called.
First we need a helper function to move a particle in the grid. Open the canvas.js file and find the moveParticle function. Replace the TODO comment with the following code:
1
2
3
4
export function moveParticle(row, col, newRow, newCol, swap) {
    grid[newRow][newCol] = grid[row][col];
    return true;
}
This function takes the current row and column (row, col) of a particle and the new row and column (newRow, newCol), where we want to move it. It then simply copies the particle from its old position in the grid to its new position (ignore the return true; for now).
Now, open the particles.js file and find the update method inside the Sand class. Replace the TODO comment with the following code (ignore this.swap we will be using it later):
1
2
3
update(row, col) {
    moveParticle(row, col, row+1, col, this.swap);
}
Make sure you put this code in the
updatefunction of theSandclass not the baseParticleclass.
This code calls the moveParticle function to move the sand particle from its current row and col to the row below it.
Issues with moving
There are two errors with the current implementation, they should become apparent as soon as you run this code and click on the screen. Lets fix them.
When the sand reaches the bottom of the canvas, you might start seeing errors in the console again. This is because we are trying to move the sand to a row that doesn’t exist (outside the bounds of our grid).
To fix this, we need to update the checkBounds function in canvas.js to checks if a given row and column are within the valid bounds of our grid.
Task 1: Modify the
checkBoundsfunctions so it returnstrueif the(row, col)is within the bounds ofgridandfalseotherwise. After writing function, use it inmoveParticleto prevent a particle from being moved out of bounds.
Task 1: Hint
Think about the dimensions of our grid. How can you check if a given row is within the valid range of rows? What about the column?
Try to complete the task before moving on
Answer (click to unblur):
1
2
3
export function checkBounds(row, col) {
    return row < grid.length && row >= 0 && col < grid[0].length && col >= 0;
}
moveParticle in canvas.js should look something like this:
1
2
3
4
5
6
7
8
9
10
export function moveParticle(row, col, newRow, newCol, swap) {
    // 👇 Put the following code here 👇
    if (!checkBounds(row, col) || !checkBounds(newRow, newCol)) {
        return false;
    }
    // 👆 Put the following code here 👆


    // Rest of moveParticle
}
You might notice that when the sand moves down, it leaves a trail behind it. This is because we are only copying the sand particle to the new position and not removing it from its old position.
Task 2: Modify the
moveParticlefunction incanvas.jsto stop the particles streaking as they fall.
Task 2: Hint
What do we use to represent an empty particleHint 2
Are we moving the particle or just making a new one
Try to complete the task before moving on
Answer (click to unblur):
1
2
3
4
5
6
7
export function moveParticle(row, col, newRow, newCol, swap) {
    // Rest of moveParticle

    grid[newRow][newCol] = grid[row][col];
    grid[row][col] = null; // This line is the fix!
    return true;
}
Now, the errors when the sand hits the bottom and the streaking should be gone!
Sand physics
Let’s make our sand behave a bit more realistically. Currently, it just falls straight down. Lets add a check to make sure it doesn’t overwrite other sand if there is already sand below it.
Task: Utilizing
getParticle(it returns the particle at (row, col)) add a check in themoveParticlefunction incanvas.jsto make sure a particle can not move on top of another particle:
Remember if a gird location is empty it will contain the value
null.
Answer (click to unblur):
1
2
3
4
5
6
7
8
9
10
11
12
13
14
15
export function moveParticle(row, col, newRow, newCol, swap) {
    if (!checkBounds(row, col) || !checkBounds(newRow, newCol)) {
        return false;
    }

    // 👇 Add this check 👇
    if (getParticle(newRow, newCol)) {
        return false;
    }
    // 👆 Add this check 👆

    grid[newRow][newCol] = grid[row][col];
    grid[row][col] = null;
    return true;
}
You might have noticed that we are returning true and false from the moveParticle function. This is to indicate wether a particle was moved or not, lets add some code in particles.js that moves the particle left if there is something below it.
Open the particles.js file and modify the update function in the Sand class. We’ll use the return value of moveParticle to determine if the downward move was successful. If it was unable to move down, we’ll try to move left.
1
2
3
4
5
6
7
update(row, col) {
    // Try to move down
    if (!moveParticle(row, col, row+1, col, this.swap)) {
        // If cannot move down, try to move left
        moveParticle(row, col, row, col-1, this.swap);
    }
}
The sand looks better then before, but now once sand reaches the bottom it moves to the left until it hits the border of the canvas. Lets make sure that sand stops moving.
1
2
3
4
5
6
7
8
9
update(row, col) {
    // Fall due to gravity
    let newRow = row + 1;

    // If nothing below move down
    if (!moveParticle(row, col, newRow, col, this.swap)) {
        moveParticle(row, col, newRow, col-1, this.swap);
    }
}
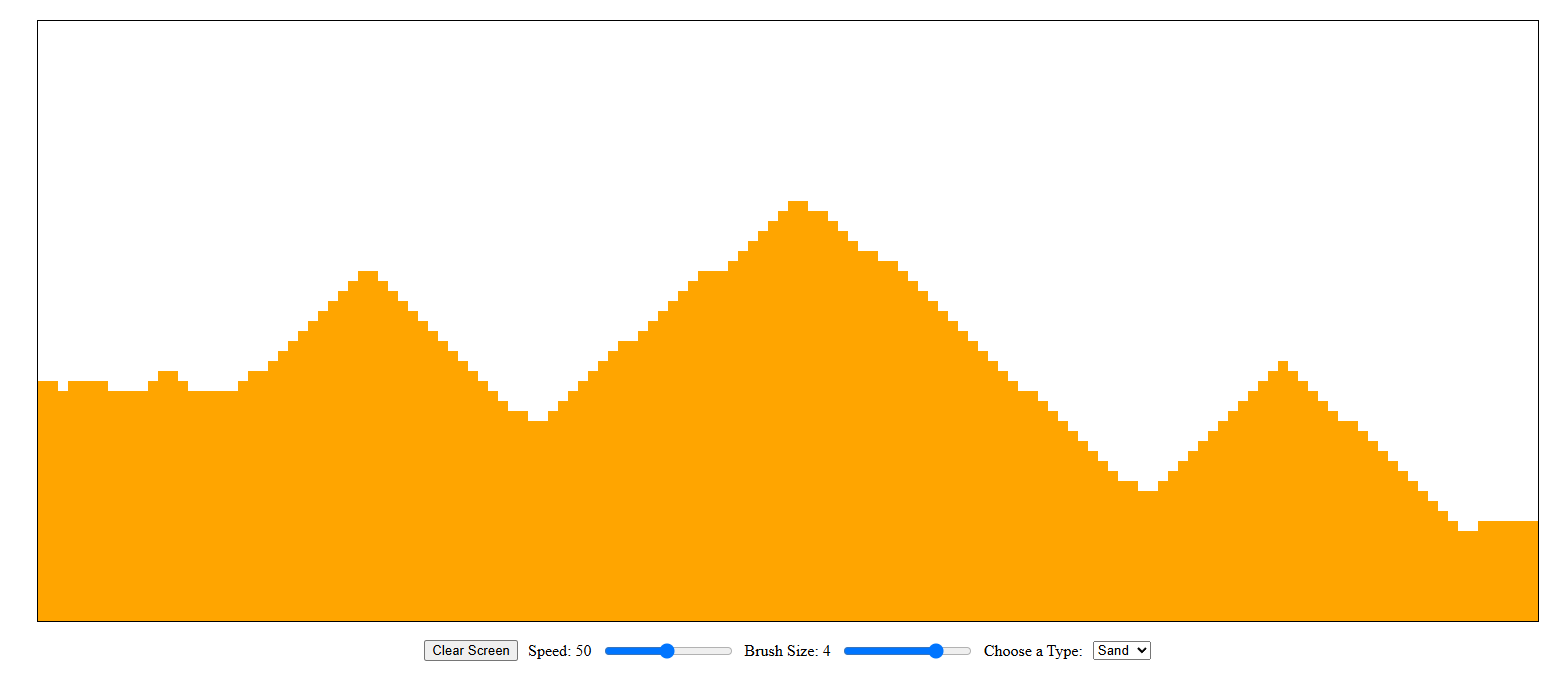
This works because when we try to move sand to the left, we are also trying to move it down, this results in the sand attempting to move below the screen which gets prevented by our bounds check. This also creates a satisfying pyramid shape.
Now lets add another check to have it move right if it can’t move left.
1
2
3
4
5
6
7
8
9
10
11
12
update(row, col) {
    // Fall due to gravity
    let newRow = row + 1;

    // If nothing below move down
    if (!moveParticle(row, col, newRow, col)) {
        // Try to move left
        if (!moveParticle(row, col, newRow, col-1, this.swap)) {
            moveParticle(row, col, newRow, col+1, this.swap)
        }
    }
}
CHALLENGE: Mess around with the sand physics, what happens if you have the sand move two steps every update (
row+2orcol+2), what if you try to move left and right first?
Congratulations! You’ve completed the first part of the Falling Sand tutorial. You can now create and make sand particles fall and react to simple physics. In the next part, we’ll introduce more particle types and make them interact with each other.