FocusTube pt. 2
In this project you will continue to learn the fundamentals of NextJS and start learning about APIs in order to make a youtube clone/wrapper that removes the distracting algorithms that hook you in.
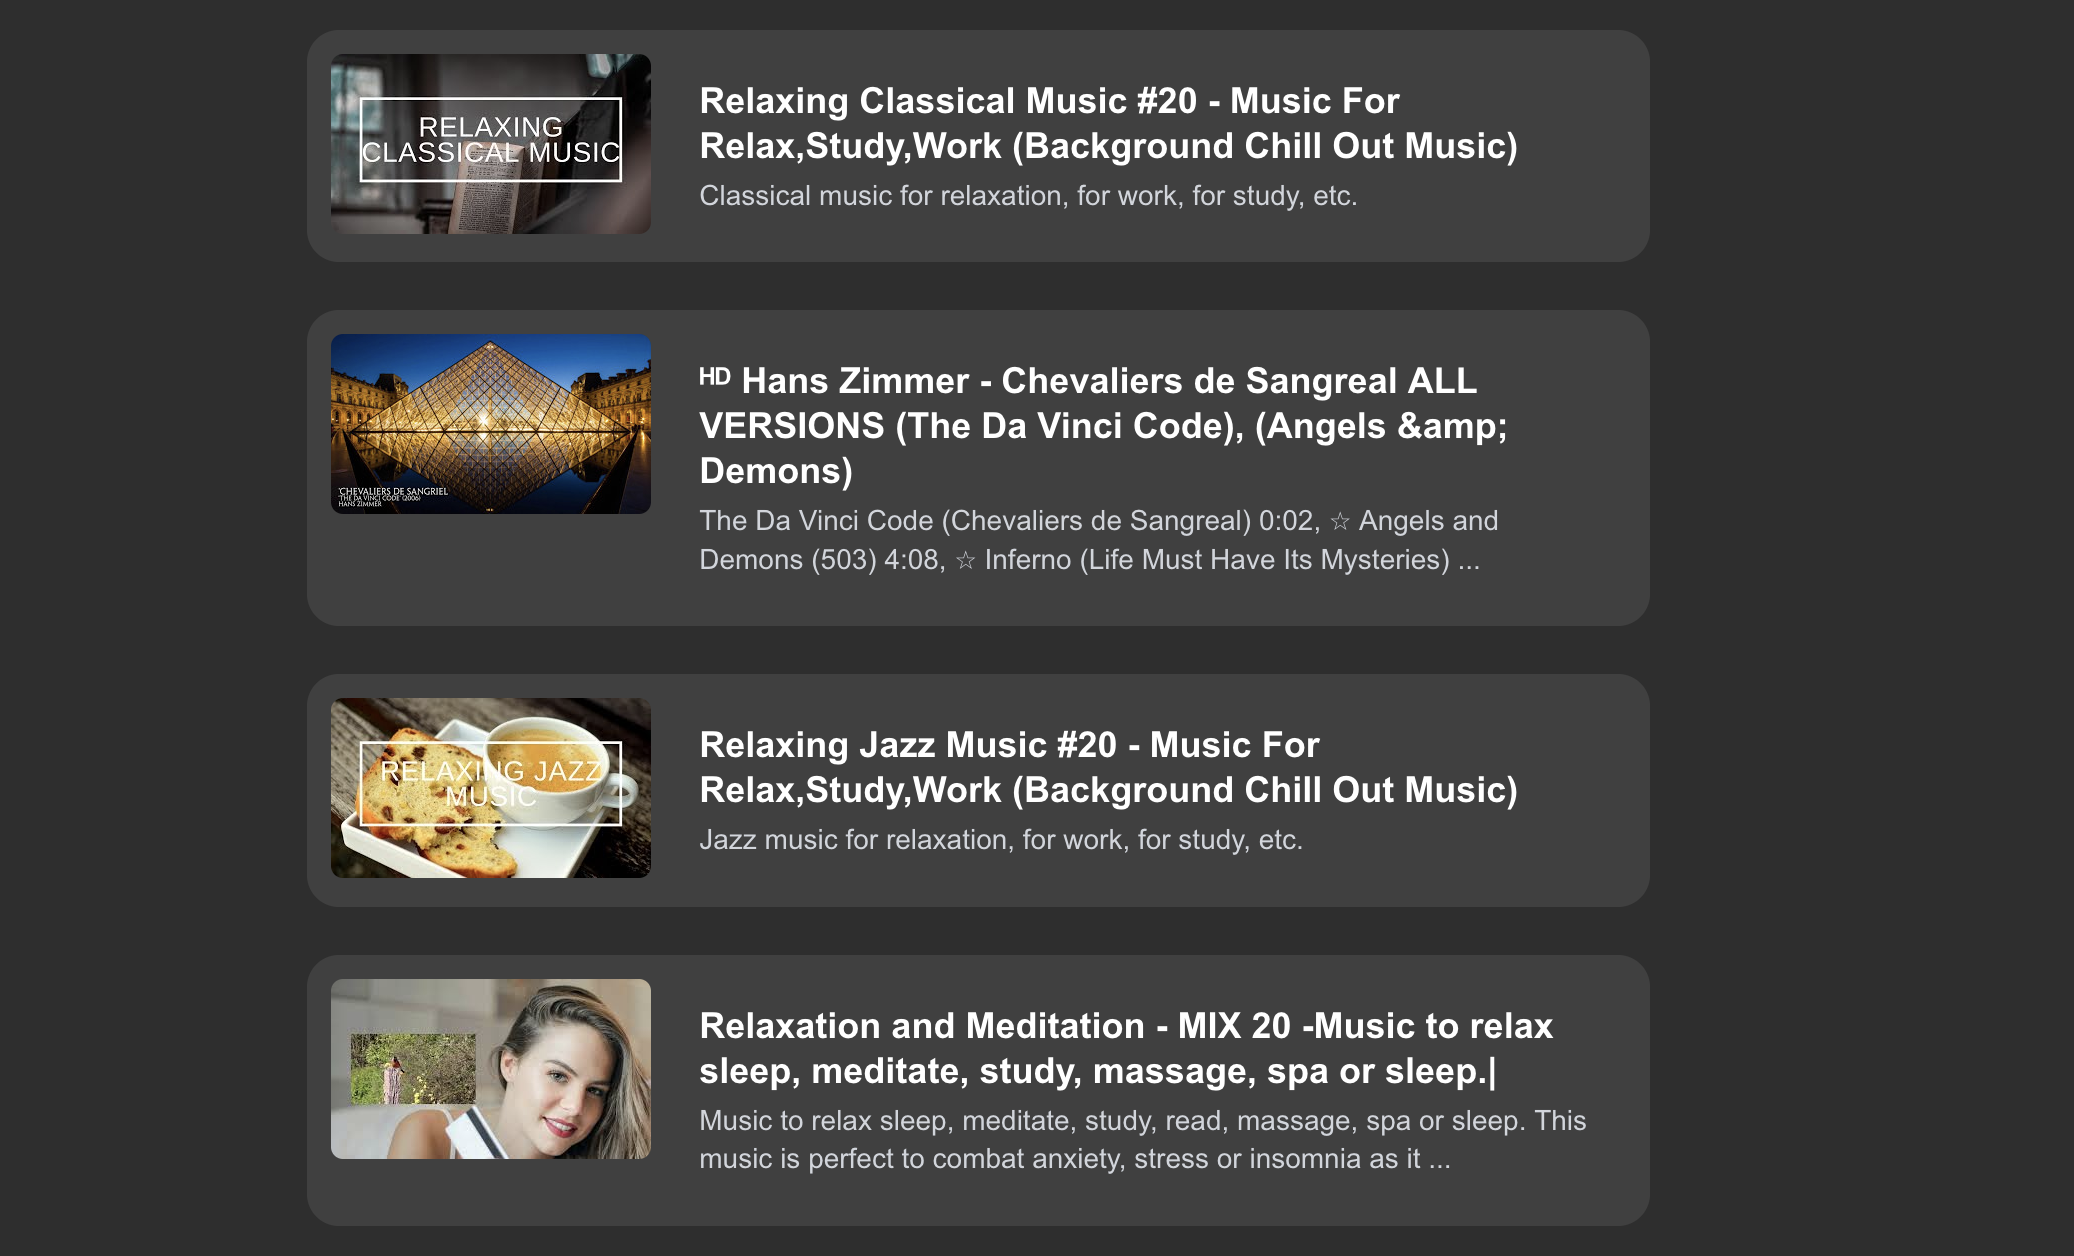
What You Will Learn in This Section
- How to use and create the fundamental parts of an API (endpoints, requests and responses) in NextJS
- How to connect, fetch, parse, and display API data from YouTube
Introduction to APIs
What is an API?
An API is an Application Programming Interface. Think of it as a bridge that allows two different pieces of software to talk to each other.
Today, we will be working with REST APIs, which are the standard way web applications communicate over the internet. They use HTTP methods—the same methods your browser uses to fetch web pages. The two most common methods are:
- GET: When you want to retrieve data from a source (like reading a webpage).
- POST: When you want to send new data to a source (like submitting a login form).
A Real-World Example
Imagine you want to build a Pokémon Information App.
The hard way to build this app would be manually researching and typing out the stats for all 1,000+ Pokémon into your own database. This is where an API saves the day. There is a free service called PokeAPI that already has all this data. You just have to ask for it!
Here is how the interaction works:
- The Request: You send an HTTP request to the API asking for specific data (e.g., “Give me the stats for Pikachu”).
- The Processing: The API server receives your request, finds Pikachu’s data in its database, and formats it.
- The Response: The server sends the data back to you in a format your code can read, usually JSON (JavaScript Object Notation).
In code, making that request looks like this:
1
2
const response = await fetch('https://pokeapi.co/api/v2/pokemon/pikachu');
const apiData = await response.json();
And the apiData you get back will look something like this:
1
2
3
4
5
6
7
8
{
 "name": "pikachu",
 "height": 4,
 "weight": 60,
 "types": [
   { "type": { "name": "electric" } }
 ]
}
QUESTION: Looking at the JSON data above, how is a JSON object similar to a standard JavaScript object? If you wanted to get the Pokemon’s weight from
apiData, what code would you write?
If you want a deeper visual explanation, check out this 3-minute video on APIs.
Transitioning to the YouTube API
Just like PokeAPI provides us with Pokémon data, Google provides a YouTube API that lets developers access real YouTube videos, playlists, and channel data programmatically.
Instead of showing Pikachu’s stats, we will be requesting real video search results to power FocusTube!
Enabling the YouTube API
Unlike PokeAPI, Google needs to know who is requesting their data to prevent abuse. To do this, we need to generate a unique “password” called an API Key.
Go to the Google Cloud Console to get started:
- If you have not made a project before, follow this quick tutorial to get one set up.
- Next, open the Navigation hamburger menu at the top left.
- Select APIs & Services > Library.
- In the search box, search for “youtube data api v3”. Click on the result, then click Enable.
- You will be taken to the dashboard. In the middle-left of the screen, select the Credentials tab.
- On the right side of the screen, click + Create Credentials and select API Key.
- Select Public data, we aren’t accessing youtube’s private user data
- Copy the generated API Key and save it somewhere safe for now. DO NOT POST THIS ANYWHERE ON THE INTERNET.
Congratulations! You now have an API key for the YouTube API.
Securing Your API Key
Because your API key acts as a password to your Google account’s API quota, you must hide it from the public.
- In the root directory of your project (the same folder that holds
package.json), create a new file named.env. - Open the
.envfile and paste your API Key like this:
1
API_KEY=yourapikeyhere
- Ensure you have a
.gitignorefile and that.envis listed inside it. This guarantees that your API key will never be uploaded to GitHub.
NOTE: Even if you aren’t using GitHub right now, you should still practice these safety measures. For a deeper dive into why this matters, check out our guide on Environment Variable Safety!
Creating your API
Now, it is time to make your NextJS API.
Making the API is about as easy as making the routes! In the /app folder, create a new folder titled api.
We need three different endpoints. (An API endpoint is a URL that acts as the point of contact between an API client and an API server):
app/api/playlistapp/api/searchapp/api/video
To create these endpoints, you need to add a route.js in each folder. This is what your tree structure should look like now:
1
2
3
4
5
6
7
8
9
10
11
12
13
14
15
16
17
18
19
20
21
22
23
24
25
26
27
28
29
30
31
32
33
34
35
my-app/
├── node_modules/
├── public/
├── src/
│   └── app/
│       ├── favicon.ico
│       ├── globals.css
│       ├── layout.js
│       ├── page.js
│       ├── search/
│       │   └── [searchId]/
│       │       ├── page.js
│       │       └── loading.js
│       ├── video/
│       │   └── [videoId]/
│       │       └── page.js
│       ├── playlist/
│       │   └── [playlistId]/
│       │       ├── page.js
│       │       └── loading.js
│       └── api/
│           ├── playlist/
│           │   └── route.js
│           ├── search/
│           │   └── route.js
│           └── video/
│               └── route.js
├── .gitignore
├── eslint.config.mjs
├── jsconfig.json
├── next.config.mjs
├── package-lock.json
├── package.json
├── postcss.config.js
└── README.md
Creating the API endpoints
We need to create a GET request for each route. As a reminder, a GET request is used when you want to access or read data.
NOTE: We will not use POST, only GET, since FocusTube only retrieves video data and does not have a database for users to upload or save data.
In every route.js put this here
1
2
3
export async function GET(request) {
 // content goes here
}
You will notice that GET has the parameter request. That is where we find the details of the API request.
For example, when we call this API, this is what our request will look like:
/api/video?videoId=randomVideoId
Notice this part: ?videoId=randomVideoId
When you create an API request, this is how you will format it. After the question mark, put any parameters that the API accepts along with the input for it.
QUESTION: Besides a
videoId, what other information do you think a robust video API might accept through query parameters? Think about searching, sorting, or filtering!
So for the one above, this API has the videoId parameter, and the input for it, comes after the equal sign.
Knowing this, we can add to the api/video/route.js
1
2
3
4
5
6
7
8
9
10
11
12
13
14
15
16
17
18
19
20
21
22
23
export async function GET(request) {
 // Create a URL object from the incoming request
 const { searchParams } = new URL(request.url);
 // Extract the value of the "videoId" from the URL
 const videoId = searchParams.get("videoId");


 // make this example data for each endpoint for
 // now, this will be used to test the API
 const data = {'message':'Success'}


 // right now we do not have anything to really send back
 // but when we do, we send a response
 // a Response has a status (200 if successful) and a
 // a JSON object with the data
 return new Response(JSON.stringify(data), {
   status: 200,
   headers: { 'Content-Type': 'application/json' }
 });
}
Understanding API Responses
When we return a new Response(), we include a status code. In our example, we use 200, which universally stands for “OK” (successful).
QUESTION: Why is it important to include status codes in an API response? Have you ever encountered a
404or500error while browsing the web? What do you think those mean in the context of an API?
Creating the Remaining Endpoints
Now that you know how to create an endpoint, you can create the route.js for /search and /playlist using the exact same structure!
If someone calls your search API, the URL will look like this:
http://localhost:3000/api/search?text=lofi&type=video
Notice how the /search URL uses an & symbol. This is how you string multiple query parameters together in a URL! The API will receive both a text parameter and a type parameter.
And for your playlist API, the URL will look like this:
http://localhost:3000/api/playlist?playlistId=myplaylistid
Test Your APIs
This part of your route
1
const data = {'message' : 'Success'}
is there for a reason. Go to each route and type them into the URL of your browser that you are using. You should see this message (or whatever message you put) at the top left of the page.
If you do, congratulations! You have successfully made your first API! Otherwise, please go back and make sure everything looks the same.
Calling YouTube API and Parsing the Data
Now that you’ve made our own API, we are now going to call the youtube API with our requests.
Why did we make our own API to call the YouTube API?
- Creating our own API means we now have a backend, which parses all the data before sending the frontend the information to display. This keeps the frontend from knowing any extra data it doesn’t need to know, adding a layer of abstraction and security.
- It is better to learn how to make your own API and backend rather than just calling them.
How to call the YouTube API
The url for the API is: https://www.googleapis.com/youtube/v3.
Everything you need to know about the YouTube API is here in the documentation.
Additionally, I’ve provided an example of calling the YouTube API in /video. As you can see, there is no need to manually type the URL; we have tools to make it easier and guarantees it to be correct:
1
2
3
4
5
6
7
8
9
10
11
12
13
14
15
 // we create a new URL object, and put the base URL we want to call
 const url = new URL("https://www.googleapis.com/youtube/v3/videos");


 // Next for the API parameters
 // instead of straight the parameters into the URL, we can
 // just set them using our URL object
 url.searchParams.set("part", "snippet,contentDetails,statistics");
 url.searchParams.set("id", videoId);


 // Remember the API key we added to our env file?
 // Well javascript lets us call it using process.env.API_KEY
 // ANYTIME WE CALL THE API WE NEED THE API KEY FOR AUTHORIZATION
 url.searchParams.set("key", process.env.API_KEY);
Feel free to add this to your /app/api/video/route.js.
Note that APIs will not always work. Sometimes, when you call an API, it may return a unsuccessful code, like 500. We need to make sure to account for these situations.
Thankfully, we can use a try and catch statement.
Here is the full /app/api/video/route.js:
1
2
3
4
5
6
7
8
9
10
11
12
13
14
15
16
17
18
19
20
21
22
23
24
25
26
27
28
29
30
31
32
33
34
35
36
37
38
39
40
41
42
43
export async function GET(request) {
   // get the parameters from the request
   const { searchParams } = new URL(request.url);
   const videoId = searchParams.get("videoId");

   // Build the url to call the API
   const url = new URL("https://www.googleapis.com/youtube/v3/videos");
   url.searchParams.set("part", "snippet,contentDetails,statistics");
   url.searchParams.set("id", videoId);
   url.searchParams.set("key", process.env.API_KEY);

   // make the attempt to call the API
   try {
       const response = fetch(url.toString());

       // we can check if it went okay, if now we want to raise
       // an error to show the API access was unsuccessful
       if (!response.ok) {
           const errorText = await response.text();
           console.error("YouTube API Error:", errorText);
           throw new Error("Failed to fetch video details");
       }

       // If it is fine, that means we can take the JSON
       // string and convert to a JSON Object so we can parse
       // the data
       const data = response.json();

       // since this was successful, we return a Response
       // with the status 200, and a json string of the data
       return new Response(JSON.stringify(data), {
           status: 200,
           headers: { 'Content-Type': 'application/json' }
       });
   } catch (error) {
       // If the API ends up not working, return why it did not
       // work, and make the status 500
       return new Response(JSON.stringify({ error: error.message }), {
           status: 500,
           headers: { 'Content-Type': 'application/json' }
       });
   }
}
THERE WILL BE A COUPLE ERRORS IN THIS FILE Use the console and NextJS helper to figure out these errors. There may be a couple things you need to add for security that were not included.
Challenge Task
Now it is your turn! Use the YouTube API Documentation and any other resources (TRY TO AVOID USING AI) to make the API calls for /api/search and /api/playlist.
Everything you need to complete this task has already been covered. I will provide the solution - with a couple errors - for /api/search without any edge-case checking, but not for /api/playlist since is very similar.
Partial Solution to Challenge Task
1
2
3
4
5
6
7
8
9
10
11
12
13
14
15
16
17
18
19
20
21
22
23
24
25
26
27
28
29
30
31
export function GET(request) {
   const { searchParams } = new URL(request.url);

   const text = searchParams.get('text');
   const channel = searchParams.get('channel');
   const type = searchParams.get('type');

   const url = new URL("https://www.googleapis.com/youtube/v3/search");

   url.searchParams.set("part", "snippet");
   url.searchParams.set("q", text);
   url.searchParams.set("type", type);

   if (type === "video") {
       url.searchParams.set("videoDuration", "medium");
   }

   const response = await fetch(url.toString());

   if (!response.ok) {
       console.log(response);
       throw new Error('Network response was not ok');
   }

   const data = response.json();

   return new Response(JSON.stringify(data), {
       status: 200,
       headers: { 'Content-Type': 'application/json' }
   });
}
QUESTION: Looking at the search parameters in the code above (
part,q,type,videoDuration), what do you think each of these represents when we’re requesting data from the YouTube API?
TASK: Complete the Playlist API Endpoint Use the partial solution above as a guide to create the
/api/playlist/route.jsendpoint! You will need to check the YouTube API documentation to see what specific parameters the Playlist endpoint requires.
Calling Custom API to the Front End to Display the Data
Now that we actually have data to put in our website, we can now display everything.
First, we call the API in /app/search:
1
2
3
4
5
6
7
8
 // encodeURIComponent is necessary since the searchId may contain
 // weird non unicode characters, this will fix that.
 const res = await fetch(
     `http://localhost:3000/api/search?text=${encodeURIComponent(searchId)}&type=video`,
     { cache: "no-store" } // this is optional
                           // included so there is always
                           // new / fresh data
 );
QUESTION: What exactly does
encodeURIComponent()do to a string like “lofi beats 2024!”? What potential issues could occur if we didn’t use this function when passing user input into our URL?
Just like how we called the YouTube API, we can call our own API. When we receieve the data, we can display it.
How to Display API Data
Try this on your own. Figure out what the API Data looks like and how you can display it. I will give a full solution to this one and a partial solution to another. You will need to do that last one on your own.
Here is what an example video search that returns two videos would look like:
1
2
3
4
5
6
7
8
9
10
11
12
13
14
15
16
17
18
19
20
21
22
23
24
25
26
27
28
29
30
31
32
33
34
35
36
37
38
39
40
41
42
43
44
45
46
47
48
49
50
51
52
53
{
 "kind": "youtube#searchListResponse",
 "etag": "dummyEtag123",
 "regionCode": "US",
 "pageInfo": {
   "totalResults": 2,
   "resultsPerPage": 2
 },
 "items": [
   {
     "kind": "youtube#searchResult",
     "etag": "etag1",
     "id": {
       "kind": "youtube#video",
       "videoId": "dQw4w9WgXcQ"
     },
     "snippet": {
       "publishedAt": "2023-01-01T00:00:00Z",
       "channelId": "UC123456789",
       "title": "Relaxing Lofi Beats",
       "description": "Perfect background music for studying and relaxing.",
       "thumbnails": {
         "default": {
           "url": "https://i.ytimg.com/vi/dQw4w9WgXcQ/default.jpg"
         }
       },
       "channelTitle": "Lofi Radio",
       "liveBroadcastContent": "none"
     }
   },
   {
     "kind": "youtube#searchResult",
     "etag": "etag2",
     "id": {
       "kind": "youtube#video",
       "videoId": "hY7m5jjJ9mM"
     },
     "snippet": {
       "publishedAt": "2023-01-02T00:00:00Z",
       "channelId": "UC987654321",
       "title": "Chillhop Essentials - Winter 2023",
       "description": "A selection of jazzy beats to relax or code to.",
       "thumbnails": {
         "default": {
           "url": "https://i.ytimg.com/vi/hY7m5jjJ9mM/default.jpg"
         }
       },
       "channelTitle": "Chillhop Music",
       "liveBroadcastContent": "none"
     }
   }
 ]
}
If the above JSON is unreadable and confusing to you, do not worry. Paste any JSON object into this website; it will help you visualize the data better.**
Now that you know what the API data may look like, you can get to the data you need. For example:
- Thumbnail =
items[i].snippet.thumbnails.medium.url - Title =
items[i].snippet.title - Description =
items[i].snippet.description - Video ID =
items[i].id.videoId
TIP: If you need a refresher on how to extract information from JSON objects, here is a quick demonstration.
To show all the videos, we need to iterate through all the videos in the items array and display a video card for each one.
First, let’s look at what a single video card would look like. We can use an anchor tag (<a>) to make the entire card clickable, wrapping the video’s thumbnail, title, and description:
1
2
3
4
5
6
7
8
9
10
11
12
<a href={`/video/${vid.id.videoId}`}>
    <img
        src={vid.snippet.thumbnails.medium.url}
        alt={vid.snippet.title}
        width={160}
        height={120}
    />
    <div>
        <h2> {vid.snippet.title} </h2>
        <p> {vid.snippet.description} </p>
    </div>
</a>
Now, instead of manually writing that block over and over for every single video, we can use JavaScript’s map() function. This function goes through our array of videos one by one, and returns our card component for each video.
Let’s build it up:
1
2
3
4
5
6
7
8
9
10
11
12
13
14
15
16
17
18
19
20
21
22
23
24
25
26
const videos = await res.json();

return (
  <div className="flex flex-col items-center w-full overflow-y-auto pb-10">
    {/* Map through the items array */}
    {videos.items?.map((vid) => {

      // We return our anchor tag card for each 'vid'
      // Note: we can't use useRouter() since this is SSR, so we stick to <a>
      return (
        <a href={`/video/${vid.id.videoId}`} key={vid.id.videoId}>
          <img
              src={vid.snippet.thumbnails.medium.url}
              alt={vid.snippet.title}
              width={160}
              height={120}
          />
          <div>
              <h2> {vid.snippet.title} </h2>
              <p> {vid.snippet.description} </p>
          </div>
        </a>
      );
    })}
  </div>
);
Your full /video/page.js should look like this:
1
2
3
4
5
6
7
8
9
10
11
12
13
14
15
16
17
18
19
20
21
22
23
24
25
26
27
28
29
30
31
32
33
34
35
36
37
38
39
40
41
42
43
44
45
46
47
48
49
50
51
"use client";

import { useParams } from "next/navigation";
import { useEffect, useMemo, useState } from "react";


export default function Content() {

 const { videoId } = useParams();

 // since this will be rendered later, since embed is an API
 // we can use useState() to set the video
 const [video, setVideo] = useState(null);

 // fetch the video and set it to the video variable
 // if there is one
 // review useEffect and useState if this seems confusing
 useEffect(() => {
   const fetchVideo = async () => {
     const res = await fetch(`/api/video?videoId=${encodeURIComponent(videoId)}`, { cache: "force-cache" });
     const vid = await res.json();
     setVideo(vid?.items?.[0] ?? null);
   };

   fetchVideo();
 }, [videoId]);

 // get the snippet from the video to extract
 const title = video?.snippet?.title ?? "No title";
 const description = video?.snippet?.description ?? "No description";

 // now display all the information
 return (
   <>
     <div className="h-lvh w-lvw flex flex-col items-center justify-start text-white">
       <h1 className="text-3xl p-2 m-2">{title}</h1>
       <iframe
         width="960"
         height="540"
         src={`https://www.youtube.com/embed/${videoId}`}
         title={title}
         frameBorder="0"
         allowFullScreen
       ></iframe>
       <div className="flex items-center justify-between max-h-1/4 w-full max-w-5xl p-4 mt-4 bg-neutral-700 rounded-lg overflow-scroll">
        <p className="mt-4 text-gray-300">{description}</p>
       </div>
     </div>
   </>
 );
}
TASK: Build the Playlist Page
Please give an attempt at making the playlist page. You will need to:
- Call your playlist API to retrieve the playlist
- Go through the items (videos) in your playlist and display them as cards
- Make sure each video links to the
/video/[videoId]/page.jsof that videoA partial solution with some intentional errors is given below, but given the demonstrations provided above, you should have more than enough to complete this on your own!
1
2
3
4
5
6
7
8
9
10
11
12
13
14
15
16
17
18
19
20
21
22
23
24
25
26
27
28
29
30
31
32
33
34
35
36
37
export default function PlaylistPage({ params }) {

   const { playlistId } =  params;

   const res = fetch(
       `http://localhost:3000/api/playlist?playlistId=playlistId`,
       { cache: 'no-store' }
   );

   const videos = res.json();

   return (
       <>
       <div className="w-screen h-screen flex flex-col items-center justify-start text-white">
           <h1 className="text-4xl mt-6 mb-4">Playlist Videos</h1>
           <div className="flex flex-col items-center w-full overflow-y-auto pb-10">
           {video.items.map((p) => {
               return (
               <a href={`/video/${p.snippet.resourceId.videoId}`} key={p.snippet.resourceId.videoId} className="w-1/2 max-w-3xl bg-neutral-700 rounded-2xl p-3 m-3 flex items-start gap-3 max-h-1/5">
                <img
                    src={p.snippet.thumbnails.medium?.url}
                    alt={p.snippet.title}
                    width={160}
                    height={120}
                    className="rounded-md shrink-0 object-fill w-40 h-30"
                />
                <div className="xflex flex-col justify-start h-full p-3">
                    <h2 className="text-lg font-semibold leading-tight mb-1"> {p.snippet.title} </h2>
                    <p className="text-sm text-gray-300 leading-snug max-h-3/4 overflow-scroll"> {p.snippet.description} </p>
                </div>
               </a>
           );
           })}
           </div>
       </div></>
   );
}
Final Challenge Task
Lastly, we need our /search/[searchId]/page.js:
- Call your playlist API to retreieve the playlist
- Go through the items (videos) in the search and display them as cards
- Be aware of edge cases! Find a way to not display shorts or any channels. (Yes, even if you specify “videos”, they sometimes show up)
- Each card should link to the
/video/[videoId]/page.jsof that video
Your solution will be very similar to the playlist page. Utilize anything in this tutorial, Google, and documentation to help you.
Extra: Where to go from here?
Congrats!
You have finished the main part of this tutorial!
There is a ton more you can do with this project, but you should have all the resources you need now to take it from here.
Here is a limited list of things you may consider for improving your website:
- Utilize the button we did not program yet (search for playlist)
- Edit “search” to accomodate playlists, or you can make a seperate playlist search (second would be easier, first is more ideal in OOD)
- Make a way to go through playlist videos
- Make a channel page
- Make a channel search page
- Show comments
- Show related videos
- An ambitious one could be to connect to your youtube account / use OAuth to view your own private content and playlists.
- Improving the design and overall look of the website
Overall, you should do whatever you want to make this project your own. Be creative and take it where you want it to go. If you thought of a different way to improve the website, do it! If you want to add something you did not see in this tutorial, don’t be afraid to do it; use your resources and make it happen!
Thank you for sticking to the end. I hope you enjoyed the ride and learned something new!