Express Authentication App
Learn how to build a secure authentication system using Express, MongoDB, React, and TypeScript

About the project
Welcome to the Express Authentication tutorial! In this project, you will learn how to build a complete full-stack contact management application with secure user authentication.
Prerequisites:
- Basic understanding of how the web works, APIs, sending and receiving requests
- Basic coding skills in JS. React skills is preferrable
What you will learn:
- How to set up a Node.js backend with Express and TypeScript
- Creating and managing MongoDB database models with Mongoose
- Implementing secure authentication with JWT (JSON Web Tokens)
- Building a React frontend with TypeScript, hooks, and context
- Proper error handling and user feedback with notifications
- Creating protected routes that require authentication
What you will make:
By the end of this tutorial, you will have built a fully functional application where users can:
- Register a new account with validation
- Log in securely with JWT authentication
- Create and view contact information
- Experience proper session management with token persistence
- Navigate through a protected application with proper routing
Further possibilities:
You can add more to this project:
- Implement refresh/access token
- Add “forget password” field and send email to user to verify
- Add edit/delete functionalities for your contact
- Improve styling
- Use a different database
Project Overview
Our application consists of two parts:
- Backend: Node.js with Express and TypeScript, connected to MongoDB
- Frontend: React with TypeScript
The application will allow users to:
- Register a new account
- Log in with secure authentication
- View their contacts
- Add new contacts
Let’s get started!
Part 1: Backend setup
We’ll begin by setting up our TypeScript configuration and creating the basic structure of our backend.
Basic setup
First we create our backend:
1
2
mkdir backend && cd backend
npm init -y
Then install dependencies:
1
2
npm install bcrypt jsonwebtoken mongoose express cors dotenv
npm install --save-dev typescript ts-node nodemon @types/bcrypt @types/jsonwebtoken @types/express @types/cors @types/node eslint prettier
Next, we will create a tsconfig.json file. It is used to manage TypeScript in our project. Run
1
npx tsc --init
You will see a newly created tsconfig.json file. You can try playing around with the settings. Mine look like this for reference:
1
2
3
4
5
6
7
8
9
10
11
12
13
14
15
16
17
18
19
20
{
  "compilerOptions": {
    "target": "ES2020",
    "module": "commonjs",
    "outDir": "./dist",
    "rootDir": "..",
    "strict": true,
    "esModuleInterop": true,
    "skipLibCheck": true,
    "forceConsistentCasingInFileNames": true,
    "baseUrl": ".",
    "paths": {
      "@shared/*": ["../shared/*"]
    },
    "composite": true,
    "sourceMap": true
  },
  "include": ["src/**/*", "../shared/**/*"],
  "exclude": ["node_modules"]
}
The rootDir property has been changed from ./src to .. since we will also need a frontend folder later. Also, later on, we will also need a types.ts file to put all our custom types inside and use it. Those types will be used in both backend and frontend. You can create a types.ts file inside both of them, but I will use a shared folder instead. That’s why we need to set up the paths and include property to include shared to our project.
You can create it right now:
1
2
cd ..           // if you are currently inside backend
mkdir shared
Then, create a types.ts file under this folder. We will revisit it later.
Next, our backend folder should be set up like this:
1
2
3
4
5
6
7
8
9
10
11
12
13
14
15
16
17
18
19
20
21
backend/
├── src/
│   ├── config.ts                 // config file for .env
│   ├── app.ts                    // app configuration
│   ├── index.ts                  // server entry point
│   ├── middlewares/              // middlewares
│   │   ├── errorHandler.ts
│   │   ├── jwtAuth.ts
│   │   ├── modifyToken.ts
│   │   └── unknownEndpoint.ts
│   ├── models/                   // models
│   │   ├── user.ts
│   │   └── contact.ts
│   ├── routers/                  // route handlers
│   │   ├── contactRouter.ts
│   │   ├── loginRouter.ts
│   │   ├── registerRouter.ts
│   │   └── userRouter.ts
├── .env                          // environment variables
├── package.json
└── tsconfig.json
Creating the models
Now we will create our models.
A model or schema is basically how our data is stored inside the database. It is a blueprint to tell us how should the data look like (e.g. which fields should the data have, the restrictions to each field, etc). The two main types of database are SQL and NoSQL. Basically, a SQL database require the data to follow the schema as strictly as possible, and invalid data (which does not follow the schema) will not allowed to be persisted. On the other hand, NoSQL database are database that are more flexible, allowing users to store data that does not have a fixed schema.
In this guide we will use MongoDB - a NoSQL database.
Now think about what your models need. In this application, we need two entities: User and Contact. User will have name, username, email, password, and a list of contact. Contact will have name, number, and belongsTo (which user).
First, for our User:
1
2
3
4
5
6
7
8
9
10
11
12
13
14
15
16
17
18
19
20
21
22
23
24
25
26
27
28
29
30
31
32
33
34
35
36
37
38
39
40
41
42
43
44
45
46
47
48
49
import mongoose from "mongoose";

const userSchema = new mongoose.Schema({
  username: {
    type: String,
    required: true,
    unique: true,
    minLength: 3,
    maxLength: 15,
    validate: {
      validator: function (v: string) {
        return /^[a-zA-Z][a-zA-Z0-9_]{2,15}$/.test(v);
      },
      message: () => "Wrong username format: Begin with letters, alphanumeric only"
                    + "(with underscores), no spaces.",
    }
  },
  name: {
    type: String,
    required: true,
    minLength: 3
  },
  email: {
    type: String,
    required: true,
    unique: true,
  },
  passwordHash: String,
  contacts: [
    {
      type: mongoose.Schema.Types.ObjectId,
      ref: 'Contact'
    }
  ]
});

userSchema.set("toJSON", {
  transform: (doc, ret) => {
    ret.id = ret._id.toString();
    delete ret._id;
    delete ret.__v;

    // DO NOT REVEAL PASSWORD HASH!!!!
    delete ret.passwordHash;
  },
});

export default mongoose.model("User", userSchema);
The validate part above is to validate our name against regex - and if it doesn’t match, the database will refuse to save the user to the database. For the contacts part, we’re using mongoose.Schema.Types.ObjectId as type. When we store objects into MongoDb, each object will have its own id. Think of this as an array of id of Contacts, so that we can convert them back to actual Contact later.
Also, the “toJSON” part at the end of our file is defining what will the object be like when transformed into JSON. We absolutely don’t want to reveal an user’s passwordHash, so we must delete that from the returned result. There are two more fields: _id and __v, in which we don’t need __v, and for _id, I chose to rename it to just id.
Next, for our Contact:
Task: Create our
Contactmodel insidebackend/src/models. It should have name, number, and a belongsTo field that reference back to an user. When referring to other objects, use its ObjectId. You should also add some validation of your choice - looking up some public regex can be a good idea.
Answer (click to unblur):
1
2
3
4
5
6
7
8
9
10
11
12
13
14
15
16
17
18
19
20
21
22
23
24
25
26
27
28
29
30
31
32
33
34
35
36
import mongoose from "mongoose";

const contactSchema = new mongoose.Schema({
  name: {
    type: String,
    required: true,
    minLength: 3,
  },
  number: {
    type: String,
    required: true,
    minLength: 8,
    maxLength: 11,
    validate: {
      validator: function (v: string) {
        return /^\d{2,3}-(\d+)$/.test(v);
      },
      message: () => "Wrong format (123-1234567).",
    },
  },

  belongsTo: {
    type: mongoose.Schema.Types.ObjectId,
    ref: "User",
  },
});

contactSchema.set("toJSON", {
  transform: (doc, ret) => {
    ret.id = ret._id.toString();
    delete ret._id;
    delete ret.__v;
  },
});

export default mongoose.model("Contact", contactSchema);
If you were able to understand the User file above, this file should be pretty similar. One difference is that the belongsTo field is not an array but instead one object - which make sense, because contacts can only be created when a user is logged in, which means that the contact can only belong to one user only.
Creating controllers
After we have defined our models, we can move on to write controllers.
A controller can generally be understood as your request handler. For example, if you create a GET request to localhost:3001/api/users, the controllers will handle that request, do various backend operations, such as talking/querying to database or getting the data, and then send back to you the response from the server. For most applications, with each model, you should write all the CRUD controllers for each object. In RESTful applications, that translates to four types of request: GET, POST, DELETE, PUT/PATCH.
For the scope of this app, I’m going to simplify things a bit. For User, we just want a POST request (registering new users) and a GET request (for login). For Contact, we want a GET, POST, and DELETE.
For User:
1
2
3
4
5
6
7
8
9
10
11
12
13
14
15
16
17
18
19
20
21
22
23
import User from "../models/user";
import { Request, Response, NextFunction } from "express";

export const getAllUsers = async (req: Request, res: Response, next: NextFunction) => {
  try {
    const users = await User.find({}).populate("contacts", { name: 1, number: 1 });
    res.json(users);
  } catch (err) {
    next(err);
  }
}

export const getById = async (req: Request, res: Response, next: NextFunction) => {
  try {
    const user = await User.findById(req.params.id).populate("contacts", { name: 1, number: 1 });
    if (!user) {
      return void res.status(404).send({ error: "User not found" });
    }
    res.json(user);
  } catch (err) {
    next(err);
  }
}
Request, Response, NextFunction are types required for our req, res, next arguments. User.find({}) is used to get all users from the database.
Remember about the Contacts we said earlier that are stored as ObjectId? populate here is used to actually display the content of the Contact - instead of just as an ObjectId (this is the “convert back to Contact part we discussed earlier when we were writing model for User). First, we have populate("contacts") to tell MongoDB to populate the contacts field in the User object. Then, the {name: 1, number: 1} is to include name and number in a Contact entity. If you don’t want to include name for example, you can leave the field out.
This file only consists of GET-ing users. For adding users, we will handle that in a different file, registerController. But I’ll hand that to you.
Task: Write a controller that supports adding users. The request contains username, name, email, and password. You should try to validate your username, email, and password (just simple
ifs are sufficient). For email validation, you might want to see this. And you will also want to hash our password before saving to our database, using bcrypt. Basically, just use this in your code
and store the password hash along with the other details into your database. You would also want to look up how to store an object to the database, if you don’t already know that.
Answer (click to unblur):
1
2
3
4
5
6
7
8
9
10
11
12
13
14
15
16
17
18
19
20
21
22
23
24
25
26
27
28
29
30
31
32
33
34
35
36
37
38
39
40
41
import User from '../models/user';
import bcrypt from 'bcrypt';
import { Request, Response, NextFunction } from 'express';

export const register = async (req: Request, res: Response, next: NextFunction) => {
  const {username, name, email, password} = req.body;

  if (username.length <= 6)
    return void res.status(400).send({
      error: "Username must be at least 6 characters"
    });

  if (password.length <= 8) {
    return void res.status(400).send({
      error: "Password must be at least 8 characters"
    })
  }

  const emailRegex = /^[a-z0-9!#$%&'*+/=?^_`{|}~-]+(?:\.[a-z0-9!#$%&'*+/=?^_`{|}~-]+)*@(?:[a-z0-9](?:[a-z0-9-]*[a-z0-9])?\.)+[a-z0-9](?:[a-z0-9-]*[a-z0-9])?$/;
  if (!emailRegex.test(email)) {
    return void res.status(400).send({
      error: "Invalid email address"
    })
  };

  const passwordHash = await bcrypt.hash(password, 10);

  const user = new User({
    username,
    name,
    email,
    passwordHash
  });

  try {
    const savedUser = await user.save();
    res.status(201).json(savedUser);
  } catch (err) {
    next(err);
  }
}
Creating the Express Application
You are not supposed to write everything at once (maybe except for models, those are the first thing you should think about before you do any coding, and should be the first thing you ever set up in a backend application). Now we have written some controllers for our User entity, let’s test them out by building a test application.
Main setup
First we have to establish our database connection and configure our environment variables.
We will use MongoDB for our database. Setup your database according to this short video. Then, create a .env file in your backend directory:
1
2
MONGODB_URI={your_mongodb_url}
PORT=3001
Important: Never commit your
.envfile to version control! Add it to your.gitignorefile.
Next, create a configuration file to handle environment variables:
1
2
3
4
5
6
7
8
9
10
11
import dotenv from 'dotenv';
dotenv.config();

const PORT = process.env.PORT || 3001;
const MONGODB_URI = process.env.MONGODB_URI || '';

export default {
  PORT,
  MONGODB_URI,
  SECRET_KEY
};
Next, set up the routers for our endpoints. It makes the function we defined in the controller to be accessible in certain endpoints. For example:
1
2
3
4
5
6
7
8
9
import express from 'express';
import { getAllUsers, getById } from '../controllers/userController';

const userRouter = express.Router();

userRouter.get('/', getAllUsers);
userRouter.get('/:id', getById);

export default userRouter;
Similarly, let’s create a router for user registration:
1
2
3
4
5
6
7
8
import express from 'express';
import { register } from '../controllers/registerController';

const registerRouter = express.Router();

registerRouter.post('/', register);

export default registerRouter;
Next, create the main Express application file:
1
2
3
4
5
6
7
8
9
10
11
12
13
14
15
16
17
18
19
20
21
22
23
24
25
26
27
28
29
30
import express, { Request, Response } from 'express';
import mongoose from 'mongoose';
import config from './config';
import cors from 'cors';

import registerRouter from './routers/registerRouter';
import userRouter from './routers/userRouter';

const app = express();

// Enable CORS for frontend communication
app.use(cors());

// Connect to MongoDB
console.log("connecting to ", config.MONGODB_URI);
mongoose
  .connect(config.MONGODB_URI)
  .then(() => console.log("connected to MongoDB"))
  .catch((error) =>
    console.log("error connecting to MongoDB: ", error.message)
  );

// Middleware for parsing JSON
app.use(express.json());

// Routes
app.use("/api/register", registerRouter);
app.use("/api/users", userRouter);

export default app;
These two lines
1
2
app.use("/api/register", registerRouter);
app.use("/api/users", userRouter);
are used to connect your routers. Think of it this way: you connect to the userRouter via the top domain /api/users. Then, to ask it to perform getById (refer to router setup part), we send a GET request to /api/users/{id}.
Finally, let’s create the entry point for our application:
1
2
3
4
5
6
import app from './app';
import config from './config';

app.listen(config.PORT, () => {
  console.log(`Server running on port ${config.PORT}`);
});
Now our basic backend application should be done. First, configure your package.json file:
1
2
3
"scripts": {
    "dev": "nodemon --watch 'src/**/*.ts' --exec 'ts-node -r tsconfig-paths/register' src/index.ts",
  }
The important part here is the -r tsconfig-paths/register part. This will enable path mapping support (like @shared/types) and without this your @shared/* imports won’t work. You can look up the rest if you don’ understand.
Then start your server:
1
2
cd backend
npm run dev
You should see the message “Server running on port 3001” and “connected to MongoDB”.
Testing
That was a lot of code. In order to check if our controllers are working properly, we have to test our controllers to see it is working as we expected. To do that we will use Postman. Watch this video for an introduction to Postman. After that, you should be able to test all of the methods below.
1. Register a New User
POST http://localhost:3001/api/register
Body (JSON):
1
2
3
4
5
6
{
  "username": "johndoe",
  "name": "John Doe",
  "email": "john@example.com",
  "password": "password123"
}
Expected Response (201 Created):
1
2
3
4
5
6
7
{
  "username": "johndoe",
  "name": "John Doe",
  "email": "john@example.com",
  "contacts": [],
  "id": "60f7b3b3b3b3b3b3b3b3b3b3"
}
2. Get All Users
GET http://localhost:3001/api/users
Expected Response (200 OK):
1
2
3
4
5
6
7
8
9
[
  {
    "username": "johndoe",
    "name": "John Doe",
    "email": "john@example.com",
    "contacts": [],
    "id": "60f7b3b3b3b3b3b3b3b3b3b3"
  }
]
3. Get User by ID
GET http://localhost:3001/api/users/{id}
(Replace the ID with the actual ID from your database)
Expected Response (200 OK):
1
2
3
4
5
6
7
{
  "username": "johndoe",
  "name": "John Doe",
  "email": "john@example.com",
  "contacts": [],
  "id": "60f7b3b3b3b3b3b3b3b3b3b3"
}
Note: Notice that the
passwordHashfield is not included in the response. This is because of ourtoJSONtransformation in the User model that removes sensitive data.
Authentication
Next, let’s implement authentication with JWT (Json Web Token). Watch this first in order to understand what is JWT and how does JWT work.
In practice, JWT is often implemented with a refresh-access token model, in which both the access token - the actual JWT that is used for authentication - have a short-lived lifecycle (typically about 15 minutes), and a refresh token that have a longer lifecycle (about a few days) are utilized. When a user connects to a server, if the access token has expired, their refresh token will be used instead, and if the refresh token is still valid, it will generate another access token, allowing the user to continuously use the service without having to log in repeatedly.
In this project I will only do the basic access token method. You can do your own research on the refresh token. Practically speaking, in a real project, unless you’re working in cybersecurity, you would end up using a library for authentication anyway.
After that you can play around on jwt.io. Notice it has three parts: headers, payload, and signature. The signature part is done using a private key. However, we don’t have a private key yet.
Task: Create a SECRET_KEY field in your
.envfile and also set it up in theconfigfile. It should not just be a random string. Use this to generate a secure key.
You might notice that a typical JWT application involves both public key and private key (assymmetric cryptography). In the scope of this project, however, we will only use a simple shared secret key (symmetric cryptography).
Which endpoints need protection?
First let’s think about it for a second: which endpoints need to be protected? In our contact management app, we want to protect endpoints that deal with user-specific data:
- Public endpoints (no authentication needed):
POST /api/register- Anyone can registerPOST /api/login- Anyone can attempt to login
- Protected endpoints (authentication required):
GET /api/users- View user informationGET /api/users/:id- View specific userGET /api/contacts- View user’s contactsPOST /api/contacts- Create new contacts
Application Flow
Now we will understand how JWT is used.
First, the user log in with credentials. If the credentials match, JWT is generated. The user can then use the JWT to perform authorized-only operations (e.g. adding a contact to an user’s contact list). So we need an endpoint to perform just that.
First, let’s create the login controller that generates JWT tokens:
1
2
3
4
5
6
7
8
9
10
11
12
13
14
15
16
17
18
19
20
21
22
23
24
import jwt from 'jsonwebtoken';
import bcrypt from 'bcrypt';
import { Request, Response, NextFunction } from 'express';
import User from '../models/user';
import config from '../config';

export const login = async (req: Request, res: Response, next: NextFunction) => {
  const { username, password } = req.body;

  const user = await User.findOne({ username });

  if (!user || !(await bcrypt.compare(password, String(user!.passwordHash))))
    return void res.status(401).send({ err: "Invalid credentials "});

  const payload = {
    username: user.username,
    name: user.name,
    id: user._id
  };

  const token = jwt.sign(payload, config.SECRET_KEY, { expiresIn: 60*60 });

  return void res.status(200).send({ token });
}
The login process works by first finding an user with the same username as provided by the request. Then, it hashes the password received from the request and compare it against the one queried from the database. If the username is not valid or the password is incorrect, it sends back a 401 unauthorized. Otherwise, a JWT is signed along with the payload and returned.
Handling JWT
Now that we have a way to generate JWTs. What about storing them and using them for authorization, e.g. to create contacts? In the frontend, the code used to send requests may look like this:
1
2
3
4
5
6
7
8
const someFunction = async () => {
  const config = {
    headers: { Authorization: `Bearer ${token}` },
  };

  const response = await axios.get(baseUrl, config);
  return response.data;
};
Typically, the JWT token will be sent through the Authorized header, as we seen above. For now, just use Postman to login first, get the token, and then send the token manually in the Authorization header when we want authorized access. We will persist and automatically use the JWT when we develop the frontend.
Also, it is the standard to send the
Authorizationheader with the formatBearer {token}instead of just your token. Just send it like that.
Next we will cover how the JWT is used.
1. Token extraction middleware
When the user is logged in and attempts to perform restricted operations, the JWT will be extracted from the request to validate it. This middleware will extracts the token from the Authorization header:
1
2
3
4
5
6
7
8
9
10
11
12
13
14
15
16
import { Request, Response, NextFunction } from 'express';
import '@shared/types';

const modifyToken = (req: Request, res: Response, next: NextFunction) => {
  const authorization = req.get("authorization");

  if (authorization && authorization.startsWith("Bearer ")) {
    // delete 'Bearer' and add new field 'token'
    req.token = authorization.substring(7);
  }

  console.log(req.token);
  next();
}

export default modifyToken;
This middleware:
- Checks for the
Authorizationheader - Extracts the token part from
Bearer <token>format - Attaches the token to the request object for later use
You will probably notice TypeScript throwing an error: type Request does not have field token. This is correct - the Request type typically does not have that field, we’re adding it into the request. So how can we fix this? This is when we use the types.ts file. Go to the shared folder (outside of backend) and add this to types.ts:
1
2
3
4
5
6
7
8
9
10
11
12
13
// extend express.Request
declare global {
  namespace Express {
    interface Request {
      user: {
        id: string;
        username: string;
        name: string;
      }
      token?: string;
    }
  }
}
This will extend the Request type to also contain the field user and token. Note that you will have to import @shared/types.ts every time you want to extend the Request.
2. JWT Authentication middleware
Now that the JWT is extracted, the next step is to validate it. This middleware validates the JWT token and extracts user information:
1
2
3
4
5
6
7
8
9
10
11
12
13
14
15
16
17
18
19
20
21
22
23
24
25
26
27
28
29
30
31
import jwt from "jsonwebtoken";
import { Request, Response, NextFunction } from "express";
import config from "../config";
import type { JwtPayload } from "@shared/types";


export const jwtAuth = (req: Request, res: Response, next: NextFunction) => {
  const token = req.token;

  try {
    if (!token) {
      return void res.status(401).json({ error: "No token provided" });
    }

    const payload = jwt.verify(token, config.SECRET_KEY) as JwtPayload;
    if (!payload) {
      return void res.status(401).json({ error: "Invalid token" });
    }

    req.user = {
      id: payload.id,
      username: payload.username,
      name: payload.name
    };

    next();
  } catch (error) {
    return void res.status(401).json({ error: "Token invalid or expired" });
  }
};
This middleware:
- Checks if token exists on the request
- Verifies the token using our secret key
- Extracts user information from the token payload
- Attaches user info to the request object
- Handles token verification errors
You will need to declare a JwtPayload type in order to stop TypeScript from throwing errors:
1
2
3
4
5
6
7
export interface JwtPayload {
  id: string;
  username: string;
  name: string;
  exp?: number;
  iat?: number;
}
Aside from username, name and id, the iat and exp means issued time and expire time of a JWT in Unix epoch, respectively. These two are pretty standard fields inside a JWT.
To summarize: the first middleware extracts the JWT and attaches it to the request. The second one validates the token, and if the token is valid, it attaches the username and id of the user to the request.
You might be wondering why we attaches the username, name and id to the request after decoding the JWT - would that expose the username and id? Well, the thing is that the JWT payload is not securely encrypted in the first place. JWT use base64 encoding, which is easily reversible, and pretty much everybody can decrypt a JWT once they obtain it. The core part of JWT is to prevent tampering - since only a slight alternation of the content will create a completely different JWT. Read more here.
3. Adding middleware to protected endpoints
Finally, we need to configure the middleware in our app.ts file.
Task: Add the login endpoint and the two middlewares above to our
app.tsfile. The login and register endpoints should still be public, but the users endpoint should be protected byjwtAuth.
Answer (click to unblur):
1
2
3
4
5
6
7
8
9
10
11
12
13
14

// ...
app.use(express.json());

app.use(modifyToken); // add the jwtToken to request

// Public routes (no authentication required)
app.use("/api/login", loginRouter);
app.use("/api/register", registerRouter);

// Apply JWT authentication for protected routes
app.use("/api/users", jwtAuth, userRouter);

export default app;
When the user login/register, there is no JWT, so the modifyToken middleware will do nothing. After that, when the user is logged in, they are assigned with a JWT. When they attempts to perform authorized-only operations, requests will be sent to userRouter with a JWT. The request will then go through the modifyToken middleware, then the jwtAuth middleware, then finally arriving at userRouter if the JWT is valid.
Creating Contact Controller
The final part of our backend is setting up contact controllers.
Task: set up
getAllContacts,addNewContactanddeleteByIdincontactController. Then create acontactRouter, and add it to theapp.tsfile and protect withjwtAuth.
Answer (click to unblur):
1
2
3
4
5
6
7
8
9
10
11
12
13
14
15
16
17
18
19
20
21
22
23
24
25
26
27
28
29
30
31
32
33
34
35
36
37
38
39
40
41
42
43
44
45
46
47
48
49
50
51
52
53
54
55
56
57
58
59
60
61
62
63
64
65
66
67
68
69
70
import Contact from '../models/contact';
import User from "../models/user";
import { Request, Response, NextFunction } from 'express';
import '@shared/types';

export const getAllContacts = async (req: Request, res: Response, next: NextFunction) => {
  const contacts = await Contact.find({}).populate("belongsTo", { username: 1, name: 1 });
  res.json(contacts);
}

export const getById = async (req: Request, res: Response, next: NextFunction) => {
  try {
    const contact = await Contact.findById(req.params.id);
    res.json(contact);
  } catch (err) {
    next(err);
  }
};

export const deleteById = async (req: Request, res: Response, next: NextFunction) => {
  const userId = req.user.id;

  if (!userId) return void res.status(401).send({ error: "Authentication required" });

  const user = await User.findById(userId);
  if (!user) return void res.status(400).send({ error: "User not found" });

  try {
    await Contact.findByIdAndDelete(req.params.id);
    user.contacts = user.contacts.filter(c => c.toString() != req.params.id);
    res.status(204).end();
  } catch (err) {
    next(err);
  }
}

export const addNewContacts = async (req: Request, res: Response, next: NextFunction) => {
  const { name, number } = req.body;
  const userId = req.user.id;

  if (!userId) return void res.status(401).send({ error: "invalid token" });

  if (!name) {
    return void res.status(400).send({ error: "Name is required" });
  }
  if (!number) {
    return void res.status(400).send({ error: "Number is required "});
  }

  const user = await User.findById(userId);
  if (!user) return void res.status(400).send({ error: "missing userId/invalid" });

  const contact = new Contact({
    name,
    number,
    belongsTo: userId
  });

  console.log("ok");

  try {
    const newContact = await contact.save();
    user.contacts = user.contacts.concat(newContact._id);

    res.status(201).json(newContact);
    await user.save();
  } catch (err) {
    next(err);
  }
}
You might want to look up
req.paramsandreq.bodyif you don’t already know it.
After that you should verify your code with Postman. It is always good practice to verify your code before moving on. This is very important later on if you work on projects with multiple people on a CI/CD system - you don’t want your app to break apart because your code went wrong.
Error handling
Currently we write our error handling code inside our backend code. However, controllers should only be used to receive requests, not to handle errors. If in the future we have multiple controllers, then we will have to repeat our error handling code across multiple controllers, which not only is not good practice, but also a pain to maintain and update.
First, for a basic error scenario: if an user try to access the wrong endpoint, we want to return a basic unknown endpoint error.
1
2
3
4
5
6
7
import { Request, Response } from 'express';

const unknownEndpoint = (req: Request, res: Response) => {
  return void res.status(404).send({ error: "unknown endpoint" });
};

export default unknownEndpoint;
Then we want to tackle more specific errors. For example, we only want our database to only contain unique email and username. If we send an invalid register request (duplicate username), the error will look like this (in the console):
1
2
3
4
5
6
7
8
9
10
11
12
13
14
15
16
17
18
19
MongoServerError: E11000 duplicate key error collection: 2weekproj.users index: username_1 dup key: { username: "root_user" }
[0]     at InsertOneOperation.execute (/home/cuongdang/projects/Imagine/2weekproject/backend/node_modules/mongodb/src/operations/insert.ts:88:13)
[0]     at processTicksAndRejections (node:internal/process/task_queues:95:5)
[0]     at async tryOperation (/home/cuongdang/projects/Imagine/2weekproject/backend/node_modules/mongodb/src/operations/execute_operation.ts:283:14)
[0]     at async executeOperation (/home/cuongdang/projects/Imagine/2weekproject/backend/node_modules/mongodb/src/operations/execute_operation.ts:115:12)
[0]     at async Collection.insertOne (/home/cuongdang/projects/Imagine/2weekproject/backend/node_modules/mongodb/src/collection.ts:285:12) {
[0]   errorLabelSet: Set(0) {},
[0]   errorResponse: {
[0]     index: 0,
[0]     code: 11000,
[0]     errmsg: 'E11000 duplicate key error collection: 2weekproj.users index: username_1 dup key: { username: "root_user" }',
[0]     keyPattern: { username: 1 },
[0]     keyValue: { username: 'root_user' }
[0]   },
[0]   index: 0,
[0]   code: 11000,
[0]   keyPattern: { username: 1 },
[0]   keyValue: { username: 'root_user' }
[0] }
We will handle it in our errorHandler file:
1
2
3
4
5
6
7
8
9
10
11
12
13
14
15
import { Request, Response, NextFunction } from 'express';

const errorHandler = (error: Error, req: Request, res: Response, next: NextFunction) => {
  console.log("ErrorHandler intercepted: ", error);

  if (error.name === "MongoServerError" && error.message.includes("E11000 duplicate key error")) {
    const duplicate = error.message.includes("email")
      ? "Email"
      : "Username"
    return void res.status(400).json({ error: `${duplicate} has already existed` });

  next(error);
};

export default errorHandler;
Reading from the logs above, we can see the error name is MongoServerError and the message includes E11000 duplicate key error. We use that to specifically target this error. Next, we check if the duplicated value is an email or username, then returning a message based on that error.
The next error we will tackle is CastError. This is thrown when an user try to access an endpoint with /:id but then the id is invalid (only for Mongoose; since this error is thrown if the id is an invalid MongoDb ObjectId). Try it out yourself with Postman and see the error, then add the error handling part.
Answer (click to unblur):
1
2
3
	//
	if (error.name === "CastError") {
    return void res.status(400).send({ error: "Invalid id" });
There are a lot more errors that I have not included. As you test your functionalities against different scenarios, you will eventually find more errors. Add them to errorHandler accordingly.
Part 2: Frontend setup
Now that our backend is set up, let’s move on to creating the frontend of our application. We will use Vite as frontend template.
Basic setup
First, outside the backend folder, run
1
npm create vite@latest
Then, enter your project name, choose React and TypeScript. After that, you can run
1
2
3
cd frontend
npm install
npm run dev
Login page
Now your app should run. However, we won’t need the app template file. You can delete the css import in main.tsx, and edit the App.tsx file into
1
2
3
4
5
6
7
8
9
10
11
12
13
14
15
16
17
18
19
20
21
22
23
24
25
26
27
28
29
30
31
32
33
34
35
36
37
38
39
40
41
42
43
44
45
46
47
48
49
50
51
52
53
54
import { useState, useEffect } from "react";
import axios from "axios";

function App() {
  const [username, setUsername] = useState("");
  const [password, setPassword] = useState("");

  interface Credentials {
    username: string;
    password: string;
  }

  const handleLogin = async (event: React.FormEvent<HTMLFormElement>) => {
    event.preventDefault();

    const credentials: Credentials = {
      username,
      password,
    };

    await handleLoginBackend(credentials);
  };

  return (
    <>
      <h1>login</h1>
      <form onSubmit={handleLogin}>
        <div>
          username
          <input
            type="text"
            value={username}
            name="Username"
            onChange={(e) => setUsername(e.target.value)}
          />
        </div>

        <div>
          password
          <input
            type="password"
            value={password}
            name="Password"
            onChange={(e) => setPassword(e.target.value)}
          />
        </div>

        <button type="submit">Login</button>
      </form>
    </>
  );
}

export default App;
After this we can have a simple login form that look like this (the register button is not present here, but overall the login should look like this):
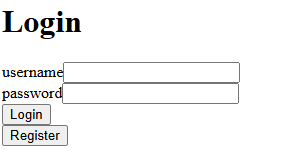
First the form have two states: username and password, contained within a form, and set up to change as the user edit the text fields. Then, the submit button is named login and linked to handleLogin. event.preventDefault() is to prevent the page from reloading. Notice that handleLogin is currently missing handleLoginBackend.
Task: Create function
handleLoginBackendthat will send the request (username and password) from the frontend from the backend we set up above. If the credentials is valid, the backend will return the JWT and you should persist it within a state. You will need to look up how to send request from frontend. I used Axios.
Answer (click to unblur):
1
2
3
4
5
6
7
8
9
10
11
12
13
14
15
16
17
18
19
20
21
22
23
function App() {
  // ...
  const [jwt, setJwt] = useState(null);

  // ...

  const handleLoginBackend = async (credentials: Credentials) => {
    const baseUrl = "/api/login";

    try {
      const response = await axios.post(baseUrl, credentials);
      const jwt = response.data;

      setJwt(jwt);
    } catch (error) {
      console.error("Login failed:", error);
    }
  };

  // ...
}

export default App;
Backend proxy
Before we move on, if you just send requests from frontend to backend like right now, chances are it will not work. If you open the console, it would be filled with errors. This is because of something called the same origin policy. To explain shortly, it’s a security feature: your frontend is running default on port 5173 (Vite default), and backend on port 3000, so they cannot communicate since they’re not on the same origin.
To mitigate this, you can install cors directly on backend and enable it, or add this to your vites.config.ts (assuming your backend is running on port 3000):
1
2
3
4
5
6
7
8
9
10
11
12
13
14
15
16
export default defineConfig({
  plugins: [react()],
  resolve: {
    alias: {
      '@shared': path.resolve(__dirname, '../shared')
    }
  },
  server: {
    proxy: {
      "/api": {
        target: "http://localhost:3000",
        changeOrigin: true,
      },
    }
  }
})
With this, you can communicate directly with the server. If you want to test your frontend code in real-time, first run your backend, then run your frontend, then test directly on your frontend port (in this case 5173) and your requests will go through.
Also, the alias part is to make sure your files recognizes the @shared/types.ts syntax.
Displaying contacts
Then, after the user is logged in, we should display the contacts.
Task: Implement displaying the list of contacts after the user is logged in. To do it, you can check if the JWT is not null.
Answer (click to unblur):
1
2
3
4
5
6
7
8
9
10
11
12
13
14
15
16
17
18
19
20
21
22
23
24
25
26
27
28
29
30
31
32
33
34
35
36
function App() {
  // ...
  const [contacts, setContacts] = useState([]);

  useEffect(() => {
    if (jwt !== null) {
      console.log(jwt);
      const contactUrl = "/api/contacts";
      const token = jwt.token;

      const config = {
        headers: { Authorization: `Bearer ${token}` },
      };

      axios.get(contactUrl, config).then((response) => setContacts(response.data));
    }
  }, [user]); // Add dependency array to prevent infinite re-renders

  return (
    <>
      // ...
      {jwt !== null && (
        <div>
          <h2>Your Contacts</h2>
          {contacts.map((contact) => (
            <div>
              {contact!.name} {contact!.number}
            </div>
          ))}
        </div>
      )}
    </>
  );
}

export default App;
If you didn’t know useEffect already you should look it up immediately. Also, here we add another variable config after contactUrl in order to send the JWT with the request.
However, If you test this code right now, you’ll notice a problem: all contacts in the database are being displayed, regardless of which user is logged in. This is a security issue! Each user should only see their own contacts.
Task: Fix so that only contacts belong to the authenticated user are displayed. To do that you’ll first need to decode your JWT in order to get the username. Use jwt-decode.
Answer (click to unblur):
1
2
3
4
5
6
7
8
9
10
11
12
13
14
15
16
17
18
19
20
21
22
23
24
25
26
27
function App() {
	const [jwt, setJwt] = useState(null);
	const [contacts, setContacts] = useState([]);

	const payload = jwt !== null
    ? jwtDecode<JwtPayload>(jwt)
    : null;

	useEffect(() => {
		if (payload !== null) {
		  const contactUrl = "/api/contacts";
		  const token = jwt.token;

		  const config = {
			headers: { Authorization: `Bearer ${token}` },
		  };

		  axios.get(contactUrl, config).then((response) => {
        setContacts(response.data.filter(
          contact => contact.belongsTo.username === payload.username
        ))
		  })
		}
    }, [payload]);

	// ...
}
The approach works like this: When jwt is null, nothing happens. But then if jwt is not null, then the entire function runs again, and then payload will run first before useEffect runs. After that, when useEffect runs, it will get the token, send it, and filter the response by payload data.
…or maybe you can change it in the backend so that the resposne already contains the filtered data? :) That approach is better but I’ll let you figure out that yourself.
Also notice JwtPayload. It is yet another defined custom types in types.ts. We will cover it right in the next part.
Refactoring and shared types
As our application grows, you might notice that our App.tsx is becoming quite large and doing many things at once. Let’s refactor our application to be more maintainable and scalable.
Component refactoring
First move the login form into its own component:
1
2
3
4
5
6
7
8
9
10
11
12
13
14
15
16
17
18
19
20
21
22
23
24
25
26
27
28
import React, { useState } from "react";

interface LoginFormProps {
  handleLogin: (username: string, password: string) => void;
}

const LoginForm = ({ handleLogin }: LoginFormProps ) => {
  const [username, setUsername] = useState("");
  const [password, setPassword] = useState("");

  const onSubmit = (event: React.FormEvent<HTMLFormElement>) => {
    event.preventDefault();
    handleLogin(username, password);
  };

  return (
    <>
      <form onSubmit={onSubmit}>
        {/* input */}
        <button type="submit">Login</button>
      </form>
      <button onClick={registerRedirect}>Register</button>
    </>
  );
};

export default LoginForm;
But then how about the backend handling part (handleLogin)? We are also going to refactor it into another file, useLogin:
1
2
3
4
5
6
7
8
9
10
11
12
13
14
15
16
17
18
19
20
21
22
23
24
25
26
27
28
29
30
31
32
33
34
35
36
37
38
39
40
41
42
43
import { useState, useEffect } from "react";
import type { LoginRequest, Contact, JwtPayload } from "@shared/types";
import axios from "axios";
import { jwtDecode } from "jwt-decode";

export function useLogin() {
  const [jwt, setJwt] = useState(null);
  const [contacts, setContacts] = useState<Contact[]>([]);

  const payload = jwt !== null
    ? jwtDecode<JwtPayload>(jwt)
    : null;

  useEffect(() => {
    if (payload !== null) {
      console.log(jwt);
      const contactUrl = "/api/contacts";
      const token = jwt.token;

      const config = {
      headers: { Authorization: `Bearer ${token}` },
      };

      axios.get(contactUrl, config).then((response) => {
      setContacts(response.data.filter(
        contact => contact.belongsTo.username === payload.username
      ))
	  })
	}
   }, [payload]);

  const handleLogin = async (username: string, password: string) => {
    // ...
  };


  return {
    payload,
    contacts,
    handleLogin,
  };
}
Task: Define the types used in this file that you have not defined in
types.ts.
Answer (click to unblur):
1
2
3
4
5
6
7
8
9
10
11
12
13
14
export interface LoginRequest {
  username: string,
  password: string
};

export interface Contact {
  id: string,
  name: string,
  number: string,
  belongsTo: {
    username: string
  }
};
Although not specifying LoginRequest for the credentials does not result in warning, it is good practice to do so. Imagine having hundreds of types of request: ContactRequest, DeleteRequest, UpdateRequest, etc., you will quickly be overwhelmed and lose track of what are which if the types are not concrete. You should also do another LoginResponse.
Next, refactor the contact displaying part into its own component:
1
2
3
4
5
6
7
8
9
10
11
12
13
14
15
16
17
18
19
20
21
22
import React from 'react';
import type { Contact } from '@shared/types';

interface ContactDisplayProps {
  contacts: Contact[];
  username: string;
}

const ContactDisplay = ({ contacts }: ContactDisplayProps) => {
  return (
    <div>
      <h2>Your Contacts</h2>
      {contacts.map((contact, index) => (
        <div key={index}>
          {contact.name} {contact.number}
        </div>
      ))}
    </div>
  );
};

export default ContactDisplay;
Here notice that ContactDisplayProps is directly defined inside the file. We certainly know that this interface is only needed inside this function and this file (where else in the code we need to display contacts like this?), so we can declare the interface straight in the file. This is mostly up to personal taste.
Finally, after refactoring, our App.tsx will be much cleaner:
1
2
3
4
5
6
7
8
9
10
11
12
13
14
15
16
17
18
19
20
import LoginForm from "./components/LoginForm";
import ContactDisplay from "./components/ContactDisplay";
import { useLogin } from "./hooks/useLogin";

function App() {
  const {payload, contacts, handleLogin} = useLogin();

  return (
    <>
      <h1>login</h1>
      <LoginForm handleLogin={handleLogin} />
      {payload !== null && (
        <ContactDisplay contacts={contacts} username={payload.username} />
      )}
    </>
  );
}

export default App;
API refactoring
Before we move on to the next part, let’s refactor our service code for better organization. The main idea is to separate all Axios-related API calls into dedicated service modules. This creates a clean separation between our UI logic and API communication.
For example, instead of handling API calls directly in our components like this:
1
2
3
4
5
6
7
8
9
10
11
12
const handleLoginBackend = async (credentials: Credentials) => {
    const baseUrl = "/api/login";

    try {
      const response = await axios.post(baseUrl, credentials);
      const jwt = response.data;

      setJwt(jwt);
    } catch (error) {
      console.error("Login failed:", error);
    }
};
We can refactor it to use a dedicated service like this:
1
2
3
4
5
6
7
8
const handleLoginBackend = async (credentials: LoginRequest) => {
    try {
      const response = await loginService.login(credentials);
      setJwt(response);
    } catch (error) {
      console.error("Login failed:", error);
    }
};
The refactored code is much cleaner and more descriptive. Instead of having to parse through implementation details to understand what a function does, we can immediately understand its purpose from the service method name. This follows a key principle in app design: keep specific implementation details separate from general business logic.
Let’s create a new loginService file under frontend/src/services:
1
2
3
4
5
6
7
8
9
import axios from "axios";
import type { LoginRequest, LoginResponse } from '@shared/types';

const baseUrl = "/api/login";

export const login = async (credentials: LoginRequest): Promise<LoginResponse> => {
  const response = await axios.post(baseUrl, credentials);
  return response.data;
};
Notice the Promise<LoginResponse> return type annotation. This is a best practice - you should always define strict data types for your function inputs and outputs. You may want to refer back to your loginController to define the appropriate data type structure for LoginResponse. After that you should refactor the whole application before moving on.
Task: Refactor your
ContactAPI calls using the same service pattern, and create a dedicated service file for any place where you’re making direct API calls in your current code.
Register page and React Router
Now we can create a register page for new users to sign up.
Let’s start with a basic register form component:
1
2
3
4
5
6
7
8
9
10
11
12
13
14
15
16
17
18
19
20
21
22
23
24
25
26
27
28
29
30
31
32
33
34
35
36
import type { RegisterRequest } from "@shared/types";
import React, { useState } from 'react';
import * as registerService from '../services/registerService';

const RegisterForm = () => {
  // ... states

  const handleSubmit = async (event: React.FormEvent<HTMLFormElement>) => {
    event.preventDefault();

    try {
      const registerData: RegisterRequest = {
        username,
        password,
        name,
        email
      }

      await registerService.register(registerData);
    } catch (err) {
      console.error(err);
    }
  }

  return (
    <>
      <h1>Register</h1>
      <form onSubmit={handleSubmit}>
        {/* name, email, username, password */}
        <button>Register</button>
      </form>
    </>
  )
}

export default RegisterForm;
The question now is: where do we put this page? Using conditional rendering for multiple pages becomes very complicated as our app grows. Instead, we’re going to develop our app to use multiple endpoints in the frontend: /login for login page, /register for register page, and /home for the main page (after logged in).
Note that in an old school web app this means sending a request to the server, refresh the page, and then we arrive at our destination. In our app, we are in fact still on the same page. We’re just simply utilizing Javascript to perform conditional rendering based on endpoints. And by the way, those endpoints are also completely unrelated to the backend.
In order to achieve this we will use React Router. First, install the dependencies:
1
npm install react-router-dom
Then make the following changes to RegisterForm:
1
2
3
4
5
6
7
8
9
10
11
12
13
14
15
16
17
18
19
20
21
22
23
24
25
26
27
// ...
import { useNavigate } from 'react-router-dom';

const RegisterForm = () => {
  // ... states
  const navigate = useNavigate();

  const handleSubmit = async (event: React.FormEvent<HTMLFormElement>) => {
    event.preventDefault();

    try {
      // ...

      await registerService.register(registerData);
      navigate("/");
    } catch (err) {
      console.error(err);
    }
  }

  return (
    <>
      {/* ... */}
      <button onClick={() => navigate("/")}>Cancel</button>
    </>
  )
}
The useNavigate hook is used to navigate to a different page. In our logic, after the registration success, we will be redirected to the default page / (which is currently where our login page is located). We also added another cancel button at the end for users to return to homepage.
Task: Do the same thing in
LoginForm: Create aRegisterbutton that navigates to/register.
After that, in App.tsx:
1
2
3
4
5
6
7
8
9
10
11
12
13
14
15
16
17
18
19
20
21
22
23
24
25
26
// ...
import { BrowserRouter as Router, Routes, Route, Navigate } from "react-router-dom";


function App() {
  const { payload, contacts, handleLogin } = useLogin();

  return (
    <>
      <Router>
      <Routes>
        <Route path="/" element={
          <>
            <h1>Login</h1>
            <LoginForm handleLogin={handleLogin} />
            {payload !== null && (
              <ContactDisplay contacts={contacts} username={user.username} />
            )}
          </>
        } />
        <Route path="/register" element={<RegisterForm />} />
      </Routes>
    </Router>
    </>
  );
}
Now we have three new keywords here: Router, Routes, and Route. Router (or actually BrowserRouter) wraps our entire application and enables routing, as well as managing the current endpoint and navigation history. The Routes is a container that group different Route into a collection, and ensure only one Route in the group will render at one time. Finally, Route should be pretty self-explanatory.
Persist login between refreshes
If you refresh the page (hard-refresh by F5) in the current state, you will be immediately logged out. The reason is that we have not stored our token in the browser to use, so it can only persist until the page is reloaded. To solve that we will use window.localStorage in order to store our token on our browser.
First, right after we’re logged in, we’re going to store the token inside a field named JwtAccessToken directly inside the browser:
1
2
3
4
5
6
7
8
9
10
11
12
13
14
15
export function useLogin() {
  // ...

  const handleLogin = async (username: string, password: string) => {
    // ...

    try {
      const response = await loginService.login(credentials);
      setJwt(response.token);
      window.localStorage.setItem("JwtAccessToken", response.token);
    } catch (error) {
      console.error("Login failed:", error);
      return false;
    }
  };
Then add another useEffect to handle the case when the page is refreshed:
1
2
3
4
5
6
7
8
9
10
11
12
13
14
15
16
17
18
19
20
21
22
23
24
export function useLogin() {
  const [jwt, setJwt] = useState<string | null>(null);
  const [contacts, setContacts] = useState<Contact[]>([]);
  const { showNotification } = useNotification();

  const payload = jwt !== null
    ? jwtDecode<JwtPayload>(jwt)
    : null;


  useEffect(() => {
    const jwtAccessToken = window.localStorage.getItem("JwtAccessToken");

    if (jwtAccessToken) {
      setJwt(jwtAccessToken);
      contactService.setToken(jwtAccessToken);
    }
  }, []);

  useEffect(() => {
    //..
  })

  // ...
Note that refresh and rerender means two different things. Rerender is just React updating some parts of the UI, and the local variables stays the same (unless you changed them, of course). For refreshing, however, we are making an entirely new request to the server, and all state stored in memory will be lost unless stored elsewhere.
It works like this: First the user is logged in, then the JWT is stored inside localStorage (see handleLogin). Then, after we refresh, all the state will be refreshed (so our jwt variable would be null), but then useEffect is called, and it retrieves the JWT we stored earlier in the browser, call setJwt, and then set the token locally inside contactService (more on that later). Since we call setJwt, the page is rerendered again, but now we have our jwt variable set up, so our app should be able to run smoothly.
For contactService, just use
1
2
3
4
let token: string;
export const setToken = (newToken: string) => {
  token = newToken;
};
This will persist the token directly inside contactService and eliminates any necessity to pass the token from outside.
Task: In the above part we did not validate if the JWT extracted from localStorage is valid or not (in particular, its expiry time). Try to validate the JWT after it is retrieved from the browser. If it’s not valid, do not continue, but rather delete the token from
localStorage. You can definitely look up on how to do this - I did the same. To test, go back to backend and changeexpiresInto a small number and try to refresh the website after.
After you’re done we can continue working on the logout part.
Task: Implement logout function. You should put it inside
useLogin. The logic is pretty simple: since the contact will not render withoutjwt, you can just clear up all of them.
Answer (click to unblur):
1
2
3
4
5
6
  const handleLogout = () => {
    window.localStorage.removeItem("JwtAccessToken");
    setJwt(null);
    setContacts([]);
    contactService.setToken("");
  };
payload will also be cleared after this since we call setJwt and setContacts.
Better routes handling
Currently we have /register for the register page. However, we want a better separation: /login for login page, /home for home page. We also want some logic handling: for example, when user logged in successfully, we want to immediately go to /home. To do that we will be upgrading our App.tsx file with more routes and logic.
Task: Upgrade your
App.tsxso that it has three routes:/login,/register, and/home. The/loginendpoint should only containLoginForm,/homeshould only containHomepage(renameContactDisplayinto this), and/registerto only contain theRegisterForm. When the user attempts to go to the default endpoint/, you should check if the user is logged in or not and then redirect correspondingly (same goes for/loginand/home). Use<Navigate>to redirect.
Hint 1 (login endpoint)
1
2
3
4
5
6
7
8
9
10
11
12
13
14
15
16
17
18
19
20
21
22
23
24
function App() {
  // useLogin()

  return (
    <Router>
      <Routes>
        {/* login route: go to /home if logged in*/}
        <Route
          path="/login"
          element={
            payload ? (
              <Navigate to="/home" replace />
            ) : (
              <>
                <h1>Login</h1>
                <LoginForm handleLogin={handleLogin} />
              </>
            )
          }
        />

	// ...
  );
}
Answer (click to unblur):
1
2
3
4
5
6
7
8
9
10
11
12
13
14
15
16
17
18
19
20
21
22
23
24
25
26
27
28
29
30
31
32
33
34
35
36
	// ... login endpoint in above hint
	{/* home route: stay if logged in, else redirect to /login */}
        <Route
          path="/home"
          element={
            payload ? (
              <Homepage
                contacts={contacts}
                username={payload.username}
                handleLogout={handleLogout}
              />
            ) : (
              <Navigate to="/login" replace />
            )
          }
        />

        {/* register: always open, only accessible via /login */}
        <Route path="/register" element={<RegisterForm />} />

        {/* default route "/": redirect */}
        <Route
          path="/"
          element={
            payload ? (
              <Navigate to="/home" replace />
            ) : (
              <Navigate to="/login" replace />
            )
          }
        />

        {/* 404 not found: create your own NotFoundPage */}
        <Route path="*" element={<NotFoundPage />} />
      </Routes>
    </Router>
The replace part in <Navigate> is for the new endpoint to replace the old endpoint in your browser history. Without replace, you could click the backwards button in your browser and you would go back to /login when you are at /home, while we don’t really want that.
NotFoundPage on backend
Looking back at our unknownEndpoint:
1
2
3
const unknownEndpoint = (req: Request, res: Response) => {
  return void res.status(404).send({ error: "unknown endpoint" });
};
We have a conflict between the frontend and backend: When we go to an unknown endpoint, for example /abcde, the unknownEndpoint middleware in backend will override the frontend, which means that our NotFoundPage will not be displayed.
One way to fix it is to separate the API calls with frontend calls:
1
2
3
4
5
6
7
8
9
import path from "path";

const unknownEndpoint = (req: Request, res: Response) => {
  if (req.path.startsWith("/api/")) {
    return void res.status(404).send({ error: "unknown endpoint" });
  }

  return void res.sendFile(path.resolve(__dirname, "../../dist/index.html"));
};
But what the heck is the last line?
Frontend production build
So far we’ve been developing our frontend in development mode. However when we actually ship the product, we should use the production build, as it is more optimized for deployment.
To build your frontend for production, run:
1
2
cd frontend
npm run build
This creates a dist folder containing optimized static files (HTML, CSS, JavaScript) that can be served by your Express server.
Now, to use the frontend production build with the backend, one option is to copy the dist folder directly from the frontend to the backend. You can automate this with a script in the backend package.json:
1
2
3
"scripts": {
    "build:fe": "rm -rf dist && cd ../frontend && npm run build && cp -r dist ../backend"
  }
This will delete the current dist folder (if present), go to frontend and build, then copy the entire folder back to the backend folder. (hence the path "../../dist/index.html" in unknownEndpoint above - it tries to load dist/index.html).
Next, go back to backend app.ts, and add one line:
1
2
3
4
5
6
7
app.use(express.static("dist")); // add it right here
app.use(express.json());

app.use(modifyToken);

// ...
This will allow the backend to serve the staticdist folder.
Notification and React Context
As our application grows, we want to provide user feedback for various actions - success messages when contacts are added, error messages when operations fail, login confirmations, etc. We want notifications that can appear from anywhere in our application: login forms, contact management, registration, and more.
Prop drilling
If we tried to implement notifications the traditional way, we’d face a problem called prop drilling. Here’s what it would look like:
1
2
3
4
5
6
7
8
9
10
11
12
13
14
15
16
17
18
19
20
21
22
// App.tsx - top level component
function App() {
  const [notification, setNotification] = useState(null);

  return (
    <LoginForm
      handleLogin={handleLogin}
      setNotification={setNotification}  // Pass down
    />
  );
}

// LoginForm.tsx - needs to pass it further down
const LoginForm = ({ handleLogin, setNotification }) => {
  return (
    <SomeChildComponent
      setNotification={setNotification}  // Pass down again
    />
  );
}

// And this continues for every component that needs notifications...
This becomes messy quickly. Every component in the chain needs to accept and pass down notification props, even if they don’t use them themselves.
React Context
React Context provides a way to share data across components without prop drilling. It’s like creating a “global” state that any component can access directly. It consists of three main parts:
- Context: A “container” that holds the data you want to share
- Provider: A component that supplies the data to its children
- Consumer: Components that use the shared data (via hooks like
useContext)
Here’s how the pattern works:
1
2
3
4
5
6
7
8
9
10
11
12
13
14
15
16
17
18
19
20
// 1. Create the Context
const MyContext = createContext();

// 2. Create a Provider
function MyProvider({ children }) {
  const [data, setData] = useState("some data");

  return (
    <MyContext.Provider value=>
      {children}  {/* All children can now access this data */}
    </MyContext.Provider>
  );
}

// 3. Use the Context in any child component
function SomeChildComponent() {
  // need this line to access data even if component is wrapped inside provider
  const { data, setData } = useContext(MyContext);
  return <div>{data}</div>;
}
The key insight is that any component wrapped by the Provider can access the context data, no matter how deeply nested it is. You should also look up the {children} property if you don’t know what it is - this is valid code.
Now let’s implement our notification context:
1
2
3
4
5
6
7
8
9
10
11
12
import { createContext } from 'react';
import type { NotificationType } from '@shared/types';

interface NotificationContextType {
  notification: NotificationType | null;
  setNotification: React.Dispatch<React.SetStateAction<NotificationType | null>>;
}

export const NotificationContext = createContext<NotificationContextType>({
  notification: null,
  setNotification: () => {}
});
Don’t be bothered by the long types - those are just boilerplates to avoid warnings. And by the way, for NotificationType:
1
2
3
4
export interface NotificationType {
  msg: string,
  type: string
}
Next, create a provider component that manages the notification state and renders notifications:
1
2
3
4
5
6
7
8
9
10
11
12
13
14
15
16
17
18
19
import { useState } from 'react';
import type { NotificationType } from '@shared/types';
import { NotificationContext } from '../contexts/NotificationContext';
import '../styles/index.css';

export const NotificationContextProvider = ({ children }: { children: React.ReactNode }) => {
  const [notification, setNotification] = useState<NotificationType | null>(null);

  return (
    <NotificationContext.Provider value=>
      {notification && (
        <div className={notification.type}>
          {notification.msg}
        </div>
      )}
      {children}
    </NotificationContext.Provider>
  );
};
In order to utilize this provider, we need to wrap components inside NotificationContextProvider. In our simple app, everywhere needs notification. So the easiest way can be wrap it around our App in main.tsx:
1
2
3
4
5
6
7
8
9
// ...

createRoot(document.getElementById('root')!).render(
  <StrictMode>
    <NotificationContextProvider>
      <App />
    </NotificationContextProvider>
  </StrictMode>,
)
By wrapping our entire app with NotificationContextProvider, we create this component hierarchy:
1
2
3
4
5
6
7
8
9
NotificationContextProvider (provides notification state)
└── App
    ├── Router
    │   ├── LoginForm (can use notifications)
    │   ├── RegisterForm (can use notifications)
    │   └── Homepage
    │       ├── ContactForm (can use notifications)
    │       └── ContactList (can use notifications)
    └── Any other components (all can use notifications)
Next, create a custom hook to make using notifications easier:
1
2
3
4
5
6
7
8
9
10
11
12
13
14
import { useContext } from "react";
import { NotificationContext } from "../contexts/NotificationContext";

export const useNotification = () => {
  // this extracts [notification, setNotification] from NotificationContext
  const { notification, setNotification } = useContext(NotificationContext);

  const showNotification = (msg: string, type: string) => {
      setNotification({ msg, type });
      setTimeout(() => setNotification(null), 5000);
  };

  return { notification, setNotification, showNotification };
}
Now any component can show notifications without prop drilling:
1
2
3
4
5
6
7
8
9
10
11
12
13
14
15
16
import { useNotification } from '../hooks/useNotification';

const LoginForm = ({ handleLogin }) => {
  const { showNotification } = useNotification();

  const onSubmit = async (event) => {
    try {
      await handleLogin(username, password);
      showNotification('Login successful!', 'success');
    } catch (error) {
      showNotification('Login failed', 'error');
    }
  };

  // ... rest of component
};
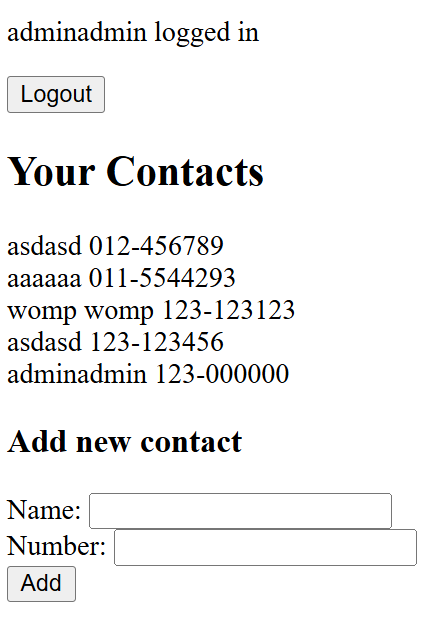
Adding new contacts
The final part is to add a small field to add new contacts to an user like this:
This is no different from the login form so you should do it yourself :)
Add styling
Currently our app have no styling at all. You can improve it by adding more CSS/Tailwind/MUI/ etc. in order to improve the appearance of the app.
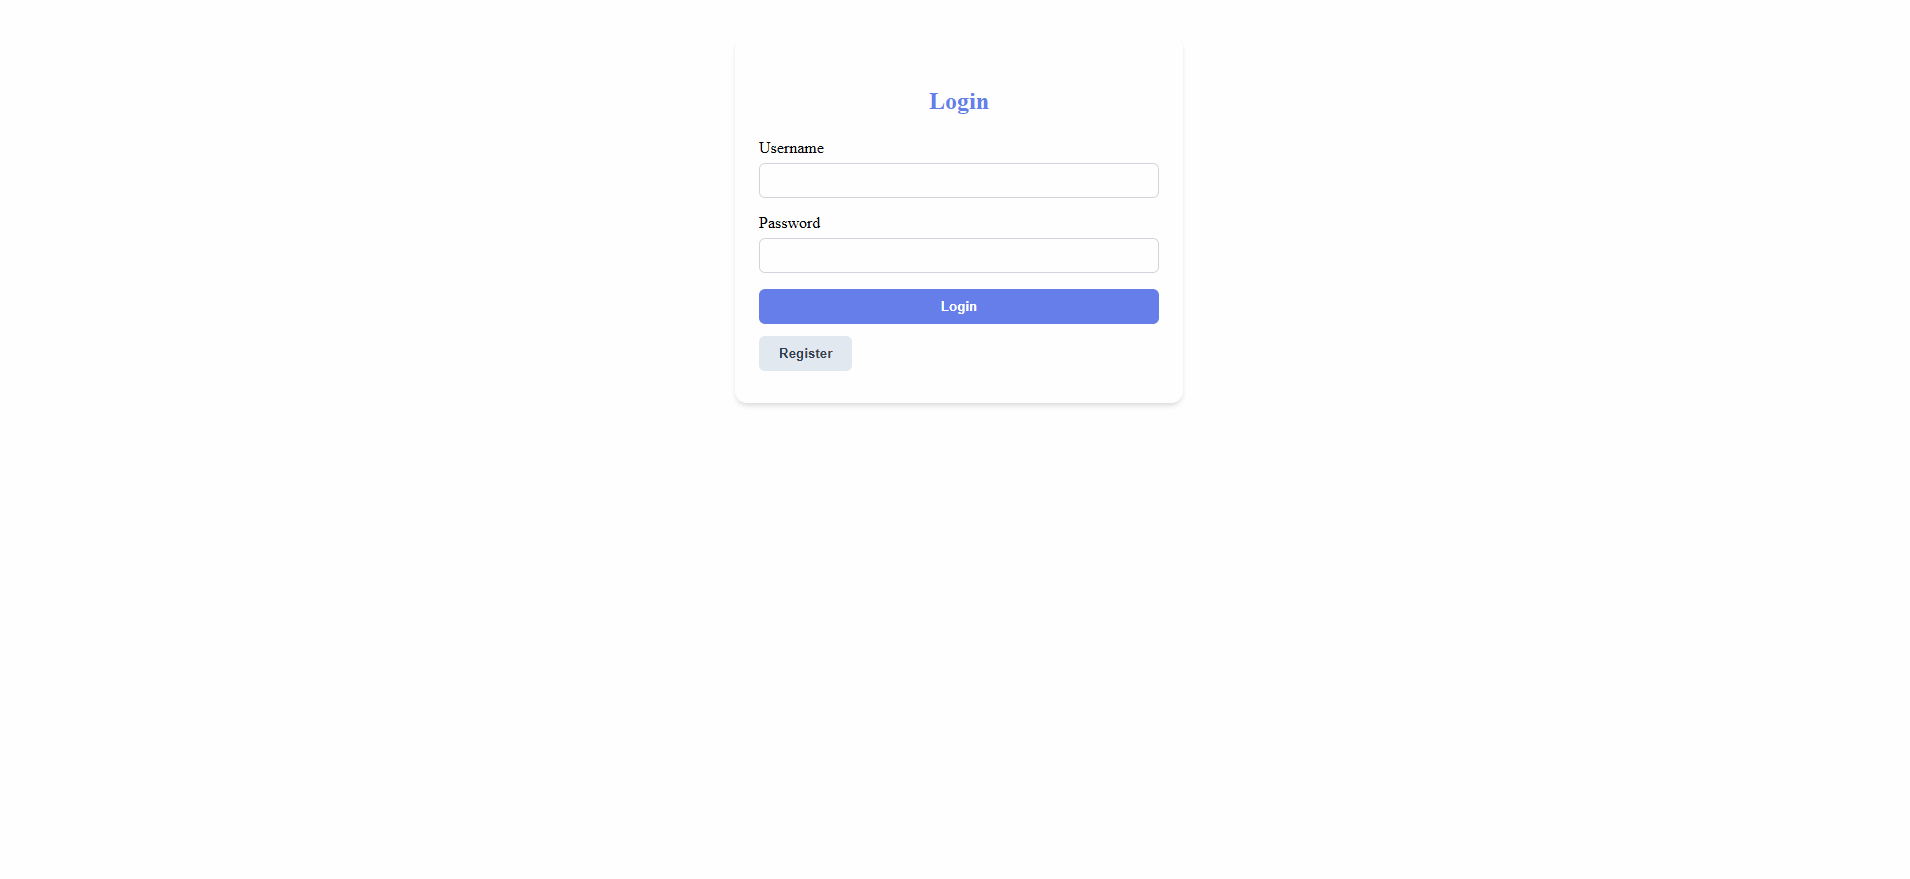
There is no right answer to this. But for example, mine look like this:
1
2
3
4
5
6
7
8
9
10
11
12
13
14
15
16
17
18
19
20
21
22
23
24
25
26
27
28
29
30
31
32
33
34
35
36
37
38
39
40
41
42
43
44
45
46
47
48
49
50
51
52
53
54
55
56
57
58
59
60
61
62
63
64
65
66
67
68
69
70
/* Homepage Styles */
.homepage-container {
  max-width: 600px;
  margin: 40px auto;
  background: #fff;
  border-radius: var(--border-radius);
  box-shadow: var(--shadow-light);
  padding: 32px 24px;
}
.homepage-header {
  display: flex;
  justify-content: space-between;
  align-items: center;
  margin-bottom: 24px;
}
.homepage-user {
  font-weight: 600;
  color: var(--primary-color);
}
.homepage-logout {
  background: var(--error-color);
  color: #fff;
  border: none;
  border-radius: 6px;
  padding: 8px 16px;
  cursor: pointer;
  transition: var(--transition);
}
.homepage-logout:hover {
  background: #b91c1c;
}
.homepage-title {
  margin-top: 0;
  color: var(--primary-color);
}
.contacts-list {
  margin-bottom: 24px;
}
.contact-card {
  display: flex;
  justify-content: space-between;
  background: #f3f4f6;
  border-radius: 8px;
  padding: 10px 16px;
  margin-bottom: 8px;
  box-shadow: var(--shadow-light);
}
.contact-name {
  font-weight: 500;
}
.contact-number {
  color: #6b7280;
}
.add-contact-form {
  background: #f9fafb;
  border-radius: 8px;
  padding: 16px;
  box-shadow: var(--shadow-light);
}
.form-group {
  margin-bottom: 16px;
  display: flex;
  flex-direction: column;
}
.form-group label {
  font-weight: 500;
  margin-bottom: 6px;
}

/* etc. */
Refer back to the gif at the beginning of the guide to see the full design.
Conclusion
Congratulations! You’ve built a complete full-stack contact management application with TypeScript, React, and Express. This application demonstrates several important concepts:
- Authentication: Secure login and registration with JWT tokens
- Data Management: Creating and retrieving contacts from a MongoDB database
- Type Safety: Using TypeScript for type checking across the stack
- User Experience: Notifications, form validation, and proper navigation
- Code Organization: Clean separation of concerns with components, hooks, and services
Happy coding!