Vanilla+ Modding
Part 1 of the Modding Minecraft series. This step will teach you the basics of modding when creating your own custom items (ie. blocks, tools, weapons, materials, etc).
About the Project
Welcome to the Vanilla+ Modding tutorial! This is the first tutorial in a series where we will teach you how to make your own Minecraft mod. This tutorial works with both Mac and Windows.
What you will learn in this tutorial:
- How to set up your enviornment
- How to create custom blocks / ores
- How to create custom items, from materials to armor / tools
- How to create crafting recipes and loot drops
Further Possibilities
After this tutorial, you could easily make your own Vanilla Minecraft mod. You will also have the resources to learn more and make even more in-depth mods.
Disclaimer
This series assumes a couple things:
- You have at least some knowledge about Minecraft
- You have experience in Java
- You have an IDE installed and ready (Intellij is recommended, but others work just fine)
Note: You technically do not need Minecraft installed on your machine to make this work, as Forge (the mod loader we are using) will download the necessary Minecraft client/server jars and assets from Mojang’s servers. I did not test this, however, so do this at your own risk.
If you do not have Intellij, I highly recommend you get it since the tutorial is structured around Intellij. The full version is available for students.
Click here to request your license. You will need to sign in using your MSU email and password.
Click here to install.
For those still struggling, watch this video.
Setting Up Your Environment
JDK 17
The first thing you need installed is the proper Java Development Kit (JDK). Specifically, you will need JDK 17.
Why JDK 17 specifically?
We are using Minecraft version 1.20.1, and this version of minecraft uses JDK 17. Hence, other JDK versions will not work.
Why are we using 1.20.1 when newer versions are out?
The goal is for the setup process to be as easy as possible for everyone. MacOS seemed to have trouble with newer versions, while this version worked right out of the box.
To download the JDK 17, click here. Download based on your OS and go through all the prompts it gives you. Now, you should be good to go!
I will not cover downloading the Java Runtime Environment (JRE) or other Java Concepts. If you are unaware of what the JRE is or do not have prior Java experience, I HIGHLY suggest you learn Java before moving forward.
Download the Mod Pack
Next, we need to download the actual mod development kit (MDK). Click here to visit the download page.
You will see two options: Latest and Recommended. Both should work fine, but the safer route is, of course, Recommended.
Within these two options, you will also see:
- A big box labeled
Installer - Top right box labeled
Changelog - Bottom right box labeled
Mdk
Click the box that says
Mdk, this will take you to a screen of a large ad. In other words, DO NOT CLICK DOWNLOAD. IT IS A SCAM / VIRUS. Instead, click Skip Ad on the top right corner when it shows up and the MDK will download after that.
Sadly, you will likely run into similar ads very often when modding with Minecraft, whether it be while downloading a new mod, resource pack, shader pack, etc. I highly recommend a good ad blocker to avoid them.
After you skip the ad, it will download forge-1.20.1-47.4.0-mdk.zip.
Unpack this folder and rename it to whatever you want your mod to be called.
This is optional, but there are some things you can delete within the folder:
- changelog.txt
- CREDITS.txt
- LICENSE.txt
- README.txt
Setting Up Intellij
You should still go through this section even if you are using a different IDE. It will cover changes to gradle.properties, settings.gradle, etc. However, the actual running of the project and using Gradle is completely on you.
Ensure you have either the full version or Community Edition of Intellij installed.
When you launch Intellij, click Open.
Select the unzipped Mdk to open. Go through the prompts. It may ask if you Trust this Project? in which you should select “yes”.
Now that it is open, you want to make sure you have the right JDK chosen.
- Go to Settings > Build, Execution, Deployment > Build Tools > Gradle
- You will see Gradle JVM with a JDK already selected. Make sure it is
temurin-17, as that is what we downloaded.
If you do not see anything selected / there is no option for
temurin-17, something likely went wrong with your installation of the Java Development Kit. Try the steps again to install the JDK, ensuring the installation is in your PATH and JAVA_HOME variables, etc.
Let’s go back to the main window of your project. You will see the Gradle logo (an elephant). Click on it to open a new window/tab, then use the refresh icon at the top left corner of the tab to build the project.
There should be no errors at this time. You should see a couple warnings, but those are not an issue as of now.
Tip: Right-click on the file tree, click Appearence, then disable Flatten Modules and Flatten Packages. This will make it so it shows ALL folders instead of combining folders like so:
com.folder1.folder2
Setting up the Mod Project
Congrats! The hardest part of this tutorial should be over. I’d be both impressed and jealous if you managed to get here with no errors or setbacks.
First, navigate to ExampleMod.java. You will find a whole lot of jargon that we do not need.
Feel free to remove:
- Any variable under
MODIDandLOGGER - The function bodies of
commonSetup,addCreative,onServerStarting, andonClientSetup
The contents of the file should look like this:
1
2
3
4
5
6
7
8
9
10
11
12
13
14
15
16
17
18
19
20
21
22
23
24
25
26
27
28
29
30
31
32
33
34
35
36
37
38
39
40
41
42
43
44
45
46
47
48
49
50
@Mod(ExampleMod.MOD_ID)
public class ExampleMod
{
    // Define mod id in a common place for everything to reference
    public static final String MOD_ID = "examplemod";
    // Directly reference a slf4j logger
    private static final Logger LOGGER = LogUtils.getLogger();

    public ExampleMod(FMLJavaModLoadingContext context)
    {
        IEventBus modEventBus = context.getModEventBus();

        // Register the commonSetup method for modloading
        modEventBus.addListener(this::commonSetup);

        // Register ourselves for server and other game events we are interested in
        MinecraftForge.EVENT_BUS.register(this);

        // Register the item to a creative tab
        modEventBus.addListener(this::addCreative);

        // Register our mod's ForgeConfigSpec so that Forge can create and load the config file for us
        context.registerConfig(ModConfig.Type.COMMON, Config.SPEC);
    }

    private void commonSetup(final FMLCommonSetupEvent event)
    {
    }

    // Add the example block item to the building blocks tab
    private void addCreative(BuildCreativeModeTabContentsEvent event)
    {
    }

    // You can use SubscribeEvent and let the Event Bus discover methods to call
    @SubscribeEvent
    public void onServerStarting(ServerStartingEvent event)
    {
    }

    // You can use EventBusSubscriber to automatically register all static methods in the class annotated with @SubscribeEvent
    @Mod.EventBusSubscriber(modid = MOD_ID, bus = Mod.EventBusSubscriber.Bus.MOD, value = Dist.CLIENT)
    public static class ClientModEvents
    {
        @SubscribeEvent
        public static void onClientSetup(FMLClientSetupEvent event)
        {
        }
    }
}
Update Mod ID and Gradle files
Mod ID
The file above has the MOD_ID variable. This ID is for uniquely identifying your mod, but it has specific requirements: It can only contain lowercase letters, numbers, underscores, or dashes. I named mine to tutorialcraft, so keep that in mind when seeing my code.
1
public static final String MOD_ID = "tutorialmod";
Mod Class Name
The class name and file name is still ExampleMod. You can rename these to be like your MOD_ID, except the class and file name can contain uppercase letters. I changed mine to be TutorialCraft.
There are quite a few areas where the class name is used. The safest and quickest way to change it is:
Highlight the current class name > right click > click refactor.
There will be an error because your file name must be the same as the name of the class inside, so make sure to update your file name accordingly.
Fix the Configuration File
You might have noticed that your config file has errors around these lines:
1
new ResourceLocation(itemName)
That is because the new version of Forge replaced its public constructors for ResourceLocation with static methods.
Change all those instances to:
1
ResourceLocation.tryParse(itemName)
Your Files at This Stage
Class import statements were not included in the following code.
1
2
3
4
5
6
7
8
9
10
11
12
13
14
15
16
17
18
19
20
21
22
23
24
25
26
27
28
29
30
31
32
33
34
35
36
37
38
39
40
41
42
43
44
45
46
47
@Mod.EventBusSubscriber(modid = TutorialCraft.MOD_ID, bus = Mod.EventBusSubscriber.Bus.MOD)
public class Config
{
    private static final ForgeConfigSpec.Builder BUILDER = new ForgeConfigSpec.Builder();

    private static final ForgeConfigSpec.BooleanValue LOG_DIRT_BLOCK = BUILDER
            .comment("Whether to log the dirt block on common setup")
            .define("logDirtBlock", true);

    private static final ForgeConfigSpec.IntValue MAGIC_NUMBER = BUILDER
            .comment("A magic number")
            .defineInRange("magicNumber", 42, 0, Integer.MAX_VALUE);

    public static final ForgeConfigSpec.ConfigValue<String> MAGIC_NUMBER_INTRODUCTION = BUILDER
            .comment("What you want the introduction message to be for the magic number")
            .define("magicNumberIntroduction", "The magic number is... ");

    // a list of strings that are treated as resource locations for items
    private static final ForgeConfigSpec.ConfigValue<List<? extends String>> ITEM_STRINGS = BUILDER
            .comment("A list of items to log on common setup.")
            .defineListAllowEmpty("items", List.of("minecraft:iron_ingot"), Config::validateItemName);

    static final ForgeConfigSpec SPEC = BUILDER.build();

    public static boolean logDirtBlock;
    public static int magicNumber;
    public static String magicNumberIntroduction;
    public static Set<Item> items;

    private static boolean validateItemName(final Object obj)
    {
        return obj instanceof final String itemName && ForgeRegistries.ITEMS.containsKey( ResourceLocation.tryParse(itemName));
    }

    @SubscribeEvent
    static void onLoad(final ModConfigEvent event)
    {
        logDirtBlock = LOG_DIRT_BLOCK.get();
        magicNumber = MAGIC_NUMBER.get();
        magicNumberIntroduction = MAGIC_NUMBER_INTRODUCTION.get();

        // convert the list of strings into a set of items
        items = ITEM_STRINGS.get().stream()
                .map(itemName -> ForgeRegistries.ITEMS.getValue(ResourceLocation.tryParse(itemName)))
                .collect(Collectors.toSet());
    }
}
1
2
3
4
5
6
7
8
9
10
11
12
13
14
15
16
17
18
19
20
21
22
23
24
25
26
27
28
29
30
31
32
33
34
35
36
37
38
39
40
41
42
43
44
45
46
47
48
49
50
@Mod(TutorialCraft.MOD_ID)
public class TutorialCraft
{
    // Define mod id in a common place for everything to reference
    public static final String MOD_ID = "tutorialmod";
    // Directly reference a slf4j logger
    private static final Logger LOGGER = LogUtils.getLogger();

    public TutorialCraft(FMLJavaModLoadingContext context)
    {
        IEventBus modEventBus = context.getModEventBus();

        // Register the commonSetup method for modloading
        modEventBus.addListener(this::commonSetup);

        // Register ourselves for server and other game events we are interested in
        MinecraftForge.EVENT_BUS.register(this);

        // Register the item to a creative tab
        modEventBus.addListener(this::addCreative);

        // Register our mod's ForgeConfigSpec so that Forge can create and load the config file for us
        context.registerConfig(ModConfig.Type.COMMON, Config.SPEC);
    }

    private void commonSetup(final FMLCommonSetupEvent event)
    {
    }

    // Add the example block item to the building blocks tab
    private void addCreative(BuildCreativeModeTabContentsEvent event)
    {
    }

    // You can use SubscribeEvent and let the Event Bus discover methods to call
    @SubscribeEvent
    public void onServerStarting(ServerStartingEvent event)
    {
    }

    // You can use EventBusSubscriber to automatically register all static methods in the class annotated with @SubscribeEvent
    @Mod.EventBusSubscriber(modid = MOD_ID, bus = Mod.EventBusSubscriber.Bus.MOD, value = Dist.CLIENT)
    public static class ClientModEvents
    {
        @SubscribeEvent
        public static void onClientSetup(FMLClientSetupEvent event)
        {
        }
    }
}
Parchment Mappings
Mojang obfuscates code before they release a new version of Minecraft, so we will use ParchmentMC mappings to make it readable.
Although Mojang does release their own mappings, they are usually incomplete, which is why Parchment mappings became the standard.
There are a couple steps needed for you to use ParchmentMC mappings.
First, add this segment into settings.gradle:
1
2
3
4
5
 pluginManagement {
     repositories {
         maven { url = 'https://maven.parchmentmc.org' } // Add this line
     }
 }
Then, update these segments in your build.gradle:
1
2
3
4
5
6
7
8
9
 plugins {
     // This should be below the net.minecraftforge.gradle plugin
     id 'org.parchmentmc.librarian.forgegradle' version '1.+'
 }

  minecraft {
    // update this line (first line under minecraft)
     mappings channel: 'parchment', version: '2023.09.03-1.20.1'
 }
Lastly, update these two lines in gradle.properties:
1
2
mapping_channel=parchment
mapping_version=2023.09.03-1.20.1
Feel free to change any of the other lines in gradle.properties as well. This is where you determine the author, version, description, etc.
For example:
1
2
3
4
5
6
7
8
9
10
11
12
# The license of the mod. Review your options at https://choosealicense.com/. All Rights Reserved is the default.
mod_license=All Rights Reserved
# The mod version. See https://semver.org/
mod_version=1.0.0
# The group ID for the mod. It is only important when publishing as an artifact to a Maven repository.
# This should match the base package used for the mod sources.
# See https://maven.apache.org/guides/mini/guide-naming-conventions.html
mod_group_id=com.example.tutorialcraft
# The authors of the mod. This is a simple text string that is used for display purposes in the mod list.
mod_authors=JohnStouffer
# The description of the mod. This is a simple multiline text string that is used for display purposes in the mod list.
mod_description=Make your own MC Mod! \nBasic mod that adds a few items, mobs, and blocks.
Congrats!
You are finally done configuring everything!
To make sure that everything is working, run this command in your terminal:
1
./gradlew genIntellijRuns
You may get a ton of warnings; that is okay, we just want to make sure we still get the
BUILD SUCCESSFULmessage.
This command will bring up many different things you can run in your right side gradle tab. We will use runClient to test our mod. Feel free to run this to make sure everything is working.
Now, it is time to do some modding!
Your First Item
I encourage you to design your own items instead of copying mine, but if you are not interested in creating your own artwork, all my items will be provided to you.
First, make a new folder inside your mod folder. In other words, if you mod is named tutorialcraft, you should be putting your new folder in com.example.tutorialcraft.
NOTE: Feel free to change the name of the com and example folders.
Name your new folder items.
Within your items folder, create the class ModItems.java. This will be a central registry class to keep track of all the items your mod wants to add.
Inside your ModItems class, create a DeferredRegister for your Forge Items:
1
2
public static final DeferredRegister<Item> ITEMS =
    DeferredRegister.create(ForgeRegistries.ITEMS, TutorialCraft.MOD_ID);
What is a DeferredRegister?
A DeferredRegister is Forge’s helper to add “things” to its registry. Right now, we are using it to add items.
Specifically, it allows us to make new items and then add them to the registry.
Right now, ForgeRegistries.ITEMS holds all the built-in items before we’ve added our mod. This is where we will add all of our own items to be in the game.
We make it static so that there’s only one copy shared by the whole mod, and final so it never gets replaced.
Making the Item Variable
Each item is a RegistryObject, which is Forge’s wrapper around anything that you register into the game.
Here is an example to add a Ruby item into the game:
1
2
3
public static final RegistryObject<Item> RUBY = ITEMS.register(
    "ruby",                                 // The name of the item
    () -> new Item(new Item.Properties())); // Passing the Supplier
What does the second line do?
Forge wants us to pass a Supplier to create an item rather than just the item itself. Additionally, items have many different properties. Calling Item.Properties() calls all of the default properties of a typical item.
You are able to override the default properties by chaining functions. We will discuss that more later.
Registering Using the ModBus
In TutorialCraft.java, there is modEventBus.
What is modEventBus?
- An event bus that is dedicated for startup events of a mod
- This makes it useful to register things into the bus
In the last section, we added an item into the register to define them. This portion is covering how to connect your items to the game’s startup process so they actually appear in Minecraft.
In ModItems.java, add a function to register our ITEMS in a startup event:
1
2
3
4
// Add this somewhere within the ModItems class
public static void register(IEventBus eventBus) {
    ITEMS.register(eventBus);
}
Next, go back to TutorialCraft.java. Register the ModBus with the new items inside of the constructor:
1
2
3
4
5
public TutorialCraft(FMLJavaModLoadingContext context)
{
    IEventBus modEventBus = context.getModEventBus();

    ModItems.register(modEventBus); // <- Add this line
Adding the Texture
To add the item texture, we will first need to put the actual PNG of it in the correct spot.
You should have a resources folder in main / src.
Add subdirectories to the resources folder so that your file tree looks like this:
1
2
3
4
5
6
7
8
9
10
11
12
13
src/
└─ main/
   └─ resources/
      └─ assets/
         └─ tutorialcraft/
            ├─ lang/
            │  └─ en_us.json
            ├─ models/
            │  └─ item/
            │     └─ ruby.json
            └─ textures/
               └─ item/
                  └─ ruby.png
If you haven’t turned off flattening for your file tree, I recommend you do it here. Instructions on how to do so is covered at the beginning of the tutorial.
Navigate to ruby.json and add:
1
2
3
4
5
6
{
  "parent": "item/generated",
  "textures": {
    "layer0": "tutorialcraft:item/ruby"
  }
}
What this means:
"parent" : "item/generated"tells the game to use the built in item/generated model for this item, which is Mojang’s default 2D flat item model (used for things like minerals, food, enchanted books, etc.). It tells Minecraft to render this as a flat texture that always faces the player, with optional multiple texture layers."layer0": "tutorialcraft:item/ruby"tells the game that the base texture layer is the ruby item in our mod
Next, we will add to the en_us.json file. This is what Minecraft uses to translate the items’ keys within the mod to readable text. Specifically, this file is for English (USA). Feel free to add more languages, such as French using fr_fr.json, etc.
1
2
3
{
  "item.tutorialcraft.ruby": "Ruby"
}
Now when look at this item in-game, its name will display as whatever you entered here.
Lastly, download ruby.png and move it to resources/assets/tutorialcraft/textures/item/.
Add Your Item to the Menu
Last but not least, we need to add our item to the creative menu.
We have a function called addCreative in TutorialCraft.java that does exactly that:
1
2
3
4
5
6
7
private void addCreative(BuildCreativeModeTabContentsEvent event)
{
    // just adding this to the Ingredients tab in the creative menu
    if (event.getTabKey() == CreativeModeTabs.INGREDIENTS) {
        event.accept(ModItems.RUBY);
    }
}
Congrats!
You have now created your own item!
There are a lot of moving components, but thankfully, you won’t have to repeat the setup processes for your additional items here on out.
Challenge Item
Time to try this on your own!
Your goal is to make a Sapphire item. However, there are additional features for you to add:
- It needs to be fire resistant
- Stacks of Sapphires can only go up to 16
- Make its durability 500
Here is the PNG for it.
Try this on your own, using documentation for help. View the hint below if you need it. Additionally, my solution is included if you get completely stuck.
HINT
1
2
Remember the chaining method I mentioned earlier when making the Ruby?
This applies here. Look at the documentation and try to implement it.
SOLUTION
1
2
3
4
5
6
7
// Use chaining to edit the properties of each item
public static final RegistryObject<Item> SAPPHIRE = ITEMS.register("sapphire",
        () -> new Item(new Item.Properties()
                .fireResistant()
                .stacksTo(16)
                .durability(500))
);
Start Up the Game!
Choose the runClient configuration and run the game. Check inside of the Ingredients tab – you should see both a Sapphire and a Ruby there.
Making Your Own Creative Tab
We do not just want to dump everything into Ingredients, since that will lump all your custom items with existing ones. So, lets make tab dedicated to your mod’s items.
Setting Up the Tab
Add a new class inside of the /items folder and call it ModCreativeModeTabs.java.
Like the items above, we need to add a DeferredRegister into this class, this time of the Creative Mode Tabs. Additionally, we need to make a register function call for the modEventBus.
1
2
3
4
5
6
public static final DeferredRegister<CreativeModeTab> CREATITVE_MODE_TABS =
    DeferredRegister.create(Registries.CREATIVE_MODE_TAB, TutorialCraft.MOD_ID);

public static void register(IEventBus eventBus) {
    CREATITVE_MODE_TABS.register(eventBus);
}
Head back to the main mod class TutorialCraft.java. Register the Creative Mod Tab with the mod event bus around the same place you did for the ModItems.
1
ModCreativeModeTabs.register(modEventBus);
Making the Tab
Just like before, we are making a RegistryObject, but this time it is a CreativeMobTab registry object.
For our Supplier parameter, we will use the builder pattern by using the CreativeModTab.builder() function.
With this, we can customize the tab to our liking. In this tutorial, we will customize the following:
- Icon: The icon that shows up for the tab
- Title: What the tab is called
- Display items: The items you want in the tab
To do this, reference the the function below:
1
2
3
4
5
6
7
8
9
10
11
12
public static final RegistryObject<CreativeModeTab> TUTORIAL_TAB = CREATITVE_MODE_TABS.register("tutorial_tab",
    () -> CreativeModeTab.builder()
        // add a icon to the tab with that being the Ruby item we made
        .icon(() -> new ItemStack(ModItems.RUBY.get()))
        // add a title to the tab
        .title(Component.translatable("creativetab.tutorial_tab"))
        // display the Ruby and Sapphire we just made
        .displayItems((pParameters, pOutput) -> {
            pOutput.accept(ModItems.RUBY.get());
            pOutput.accept(ModItems.SAPPHIRE.get());
        })
        .build());
Notice the title has
Component.translatable("creativetab.tutorial_tab"). This makes the title dynamic based on the language, just like with the Ruby and Sapphire. Inen_us.json, add the variable (“creativetab.tutorial_tab”) and set the value as whatever you want to call your tab.
Now, any time we add a new item to the mod, we can keep it in our own tab.
Your First Block
It’s time to add our own blocks! Specifically, I will make the ores for the Ruby and Sapphire.
First, we need a new folder called block in the tutorialcraft folder. (tutorialcraft should now encase both the /items folder and the block folder.)
Within the block folder, make a new class called ModBlocks.java.
Follow the same two steps as usual:
- Make the
DeferredRegisterof Forge’sBLOCKSinstead ofITEMS - Create a
registermethod to register themodEventBus
I will let you do that part yourself. The full file is included below.
We need two more methods: registerBlock and registerBlockItem.
1
2
3
4
5
6
7
8
9
10
11
12
13
14
15
16
17
18
19
20
21
22
public class ModBlocks {

    public static final DeferredRegister<Block> BLOCKS =
            DeferredRegister.create(ForgeRegistries.BLOCKS, TutorialCraft.MOD_ID);

    // Register a block: takes care of registering it with the forge blocks, as well as calling to register
    // the block as a item as well
    private static <T extends Block> RegistryObject<T> registerBlock(String name, Supplier<T> supplier) {
        RegistryObject<T> block = BLOCKS.register(name, supplier);
        registerBlockItem(name, block);
        return block;
    }

    // method to make the blocks as items as well
    private static <T extends Block> void registerBlockItem(String name, RegistryObject<T> block) {
        ModItems.ITEMS.register(name, () -> new BlockItem(block.get(), new Item.Properties()));
    }

    public static void register(IEventBus bus) {
        BLOCKS.register(bus);
    }
}
Make sure to add this line in the TutorialCraft.java class as well since we have our register method:
1
2
3
4
5
6
7
8
public TutorialCraft(FMLJavaModLoadingContext context)
{
    IEventBus modEventBus = context.getModEventBus();

    ModCreativeModeTabs.register(modEventBus);
    ModItems.register(modEventBus);
    ModBlocks.register(modEventBus);
Why are we registering the blocks as items?
Blocks only exist in the world itself; the blocks you see in your inventory and creative menu are actually BlockItems. Hence, we need to register them not only as blocks for the world environment, but also as items the user can carry around and select.
Making the Ruby Ore
The process of making the blocks is incredibly similar to making the items:
- Make a registry object of the block
- Provide the name identifier and supplier function
- Edit its properties
1
2
3
4
public static final RegistryObject<Block> RUBY_ORE = registerBlock(
    "ruby_ore",
    () -> new Block(BlockBehaviour.Properties.copy(Blocks.DIAMOND_ORE)) // we want this to mock diamond ores properties
);
Simple as that! We also to update en_us.json to translate ruby_ore.
Additionally, you will need to make new folders in the resources folder for the ruby ore block JSON file, item JSON file, and texture. Here is what your file tree for resources should look like now:
1
2
3
4
5
6
7
8
9
10
11
12
13
14
15
16
17
18
src/
└─ main/
   └─ resources/
      └─ assets/
         └─ tutorialcraft/
            ├─ lang/
            │  └─ en_us.json
            ├─ models/
            │  ├─ item/
            │  │  ├─ ruby.json
            │  │  └─ ruby_ore.json
            │  └─ block/
            │     └─ ruby_ore.json
            └─ textures/
               ├─ item/
               │  └─ ruby.png
               └─ block/
                  └─ ruby_ore.png
Interestingly, we also need to add blockstates.
What is a blockstate?
Blocks can have different appearances depending on its state, such as furnace being lit or not. Thankfully, ores only have one state.
To add blockstates, we need a new folder in our assets/tutorialcraft folder titled blockstates/.
Within that folder, create a new file called ruby_ore.json and add this:
1
2
3
4
5
{
  "variants": {
    "": { "model": "tutorialcraft:block/ruby_ore" }
  }
}
Again, this clarifies that we only have one variant, so no matter the state, it displays as the one texture we provided.
Here is what block/ruby_ore.json should look like:
1
2
3
4
5
6
{
  "parent" : "minecraft:block/cube_all",
  "textures" : {
    "all" : "tutorialcraft:block/ruby_ore"
  }
}
Ores also have the same texture around the entire block, so we can take one image and apply it to every side. Hence, the parent is "minecraft:block/cube_all".
item/ruby_ore.json should look like:
1
2
3
{
  "parent" : "tutorialcraft:block/ruby_ore"
}
Since we already have the block declared, we can reference it when declaring the item version.
Next, in en_us.json and any other languaged you are supporting, make sure to add:
1
"block.tutorialcraft.ruby_ore" : "Ruby Ore"
Next, download the PNG for the ruby ore and put it in the textures/block folder.
Lastly, we can add the ruby ore item to our CreativeTab by calling this inside of the displayItems method:
1
pOutput.accept(ModBlocks.RUBY_ORE.get());
Run the Client
Run the program using runClient to verify that the block exists. If it looks all good, then congrats – you now have you first block!
Just like with items, adding blocks usually follows this pattern, with some variation in what you are creating .
Challenge Block
Now lets make Sapphire Ore!
Complete the same steps above to create the sapphire ore. However, there a couple things I want you to change to make this ore more interesting:
- Make it so this ore has the friction of ice. (You slide when you walk over it)
- Make the sound of the ore sound like Amethyst
- Edit the strength of this ore
- Set destroy time to 6.0
- Set explostion resistance to 6.5
Here is the PNG for it.
There will NOT be a solution provided for this one. There is a hint below, but you should able to comfortably figure out how to do this given this documentation and Google (try your best not to use AI right now).
1
2
Remember the chaining you did for the item properties?
Try that again! Typing a period should show you a list of functions you can use as well.
Making Your Own Tools
Lets try making our own tools, too!
We have made items before, and as mentioned before, items are for your inventory and creative mode tabs, so tools / weapons are also items. However, they have more functionality than other items that are just in your inventory, so they have their own subclasses. It is rather simple in practice. For example, instead of using Item.Properties(), you would call SwordItem.Properties().
There are also different ways to customize these items, which will be covered.
We will go over creating a custom sword item, after which you will be able to create the rest of the tools on your own.
Create a Sword
We need to add the following for every new item:
- The PNG for the item texture
- Translation from its item ID to its language value in
en_us.json - A JSON file for the item’s appearance
- Add the item and register it
- Add it to the creative mode menu
A quick overview of each step is provided, going in more detail on the new / different things, but you should be getting pretty comfortable with creating your own items now.
Add the PNG for the Item Texture
Here is the link to the ruby sword’s PNG. Download it, then add it to resources/assets/tutorialcraft/textures/item.
Set the Item ID’s Language Value
Create a new variable in the resources/assets/tutorialcraft/lang/en_us.json file.
For example:
1
"item.tutorialcraft.ruby_sword" : "Ruby Sword"
Make the JSON File for the Item’s Appearance
This will look nearly identical to the ones you made for Ruby and Sapphire. There is only one key difference: tools and weapons are handheld items, not flat generated ones.
If you do not understand what the above means, I suggest you search Google for the answer. Try your best to find resources – there are many out there.
If you are struggling to find any answers, read this.
Add the Item and Register It
Since we already have our ModItems.java class, we register the ruby sword there to avoid creating new, unnecessary register functions.
TRY TO DO THIS YOURSELF. I have given enough hints and I am confident you can figure out this code on your own, especially if you use Google and the documentation. I will show what I have below still (WITH ERRORS), but please try it on your own.
1
2
3
4
5
6
7
8
9
10
11
12
// Add this into your ModItems.java
public static final RegistryObject RUBY_SWORD   = ITEMS.register("ruby_sword",
    () -> new Sword(
        DiamondTier,            // Tier of the weapon (Netherite being the best and Wood being the worst)
        3,                      // Attack Damage Modifier. (final damage = tier damage + this number)
        -2.4,                  // Attack speed modifier (lower = slower, -2.4F is standard for a sword)
        new Item.properties
    )
);

// Add this in ModCreativeModeTabs.java to add it to the inventory
pOutput.accept(ModItems.RUBY_SWORD.get());
TIP: If you go to
.minecraft/versions/[version]/[version].jaron your own system, you can find all of Minecraft’s built-in assets. You will be able to view the JSON files for how certain items are made.
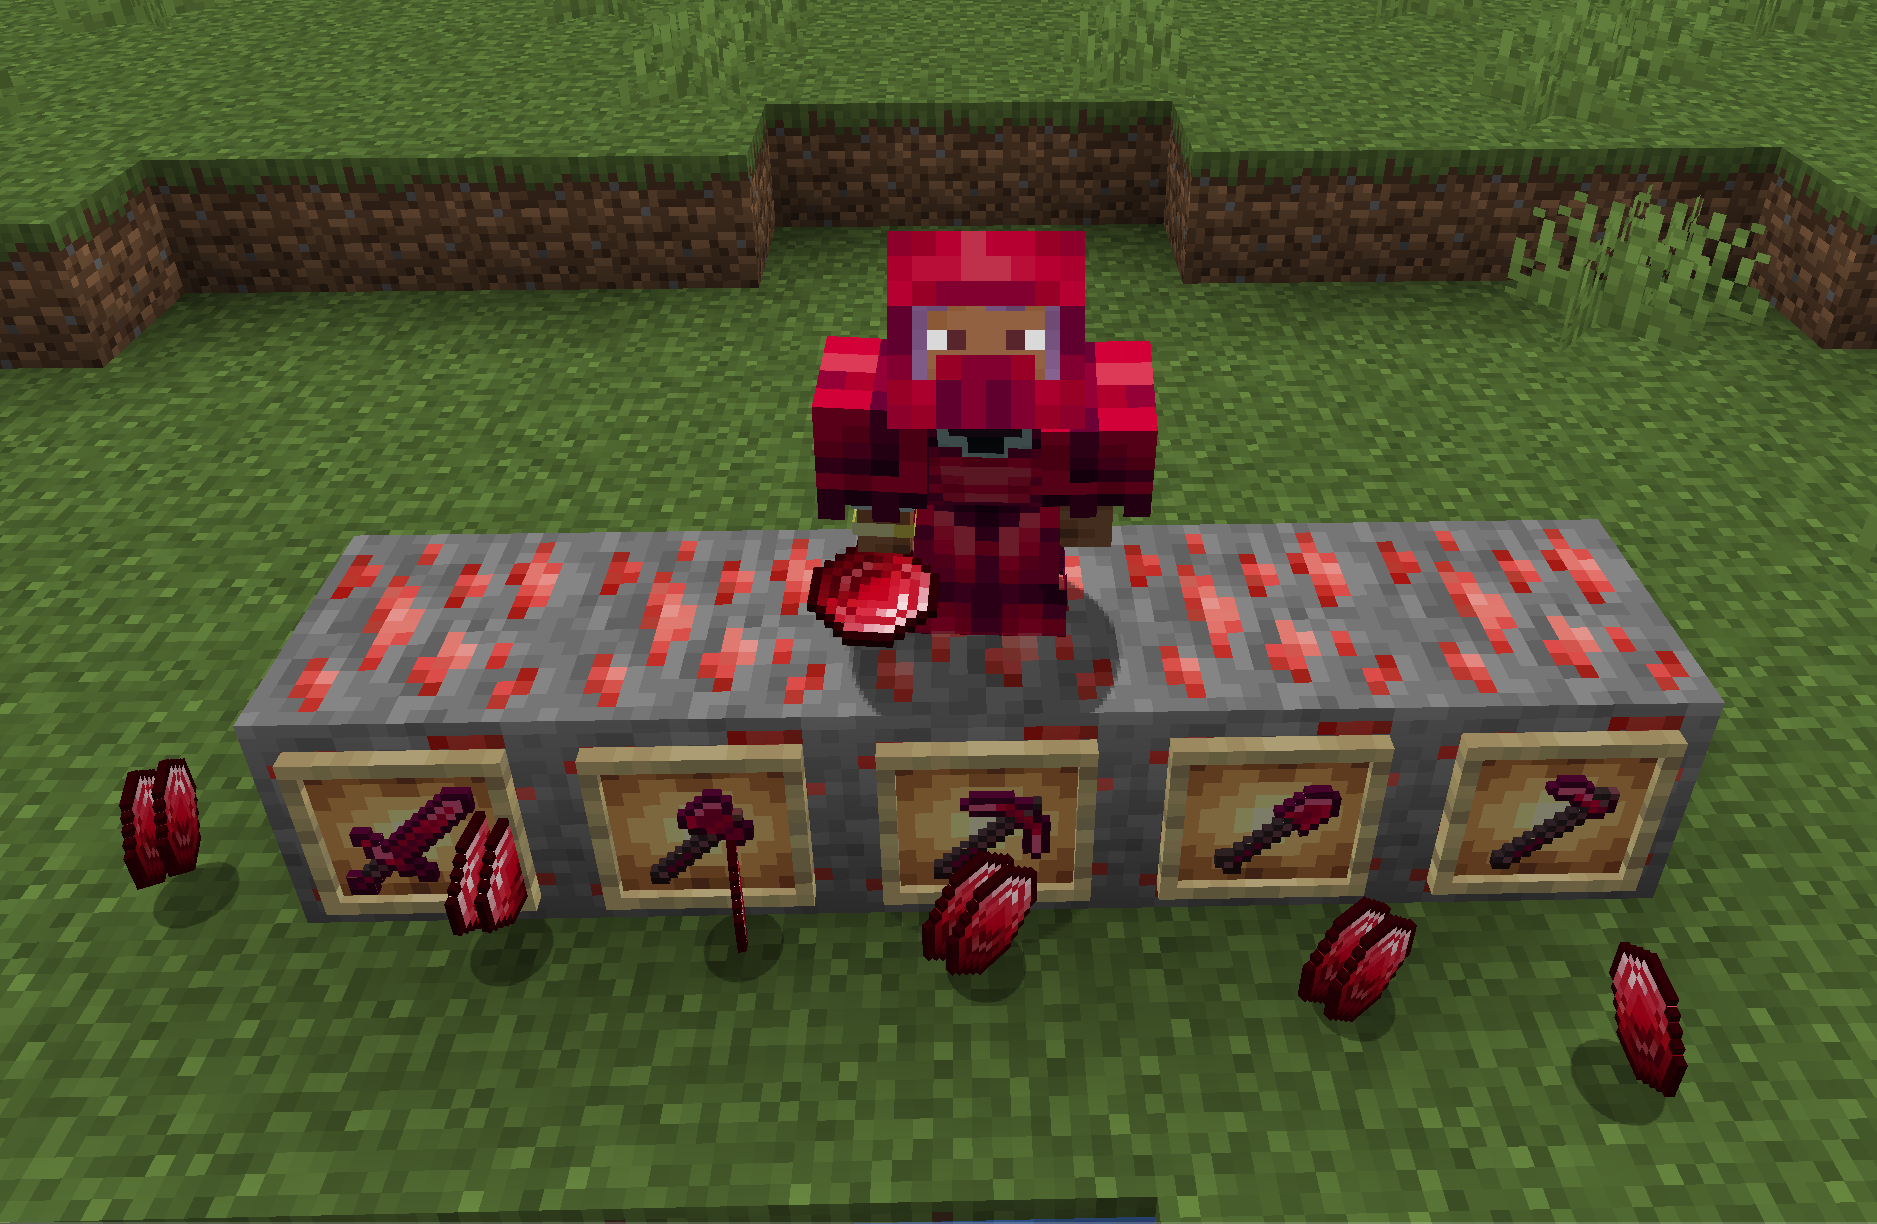
Create the Rest of Your Tool Set
Now that you have created items, a sword, and have access to resources within your own systems and on google, do your best to make the rest of the tool set. Here is the art for your convenience:
Making Your Own Armor
This section marks the last bit of instruction in this tutorial before we leave it up to you… Lets make some armor!
The only code covered will be what goes in ModItems; you should be more than fine doing the rest on your own using previous examples, documentation, Google, etc.
1
2
3
4
5
6
7
public static final RegistryObject<Item> RUBY_HELMET = ITEMS.register(
    "ruby_leggings",
    () -> new ArmorItem(
        "ruby",                  // material used IMPORTANT FOR THE TEXTURES
        ArmorItem.Type.HELMET,   // Type of armror
        new Item.Properties()));
Wearing the Armor
Why is specifying the material used for the armor so important?
Forge will take the provided material name and add the strings “_layer_1.png” and “_layer_2.png” to find the textures used for when you WEAR the armor. Therefore, the material name NEEDS TO LINE UP WITH YOUR TEXTURE PNG FILE NAMES.
Where do we put the files for the textures of what we are wearing?
In your
textures/folder, create a new folder calledmodels/. Then inside ofmodels/, make another folder calledarmor/. This is where Forge will look for the textures of the armor you wear.
Here is a link to the two PNGs for you to add.
Finish the Armor Set
You should have more than enough resources by now to make the rest of the armor set.
Feel free to finish it up, make a different one with Sapphire, or design your own. The sky is the limit!
Challenge Tasks
Congrats!
You are officially done with the instruction part of this tutorial!
You should confidently be able to:
- Set up the modding enviornment
- Make new items within the game
- Create new blocks within the game
- Create new armor and tools within the game
Of course, there is WAY more you can do with modding, and to encapsulate all Vanilla modding into one tutorial is quite impractical, if not impossible. I encourage you to continue developing your project without a tutorial. Below are some first steps on what you can try next.
Crafting Recipes
- None of the armor or tools are craftable right now! Look up how to make them craftable – there is plenty of information within the documentation and forums
Loot Tables
- If you mine the blocks you made, they don’t drop anything. Create loot tables so that they drop what you want them to drop.
Armor Trims
- Modern Minecraft has armor trims of all sorts. Right now, they can’t be used on your new armor. Make it so you can.
Make Your Own Tiers for Weapons and Armor
- Why should your weapons and armor be confined to the existing tiers like Diamond or Netherite? Make your own tier!
Your Own Ideas
- Most importantly, this is YOUR MOD. Add what YOU want to add. Make Minecraft how YOU want to play it.
Thank you for making it this far, I hope this tutorial helped introduce you to Minecraft modding. Keep on creating!